Members Login
Username 
 
Password 
    Remember Me  
Post Info TOPIC: Paddy's Nova Mk2


Veteran Member

Status: Offline
Posts: 44
Date:
Paddy's Nova Mk2
Permalink  


Well, I guess the best place to start is at the beginning, so...


The story starts with me just a wee kiddy going to kitcar shows with my dad, and probably at the age of 10 or younger I saw my first Nova. That was it - I was sold, I HAD to have me one of those. The Nova is an all original design by the noted designer Richard Oakes, based on a VW Beetle in the same way as a beach buggy, but with mad futuristic (for 1970!) styling. Oh yeah, no doors, the whole roof lifts up on hydraulic rams - quite the party trick! Typical kid 'I want one of them when I'm older'...


...well I got older!


Skip ahead around a decade, and there I was browsing eBay one day when I saw her. Other end of the country you say? 'Needs some work' you say? Deaf ears - I had to have! So hours and hours on trains and there I am, cash in pocket. I did test drive her, and she was a ***** to drive - gear change all over the shop, clutch so heavy Arny would struggle, damp interior. Didn't matter - cash was exchanged, documents signed, hands shaken. 


Despite the fact she hadn't gone any further than the end of the road for years, I set about driving the couple of hundred miles home. Around 50 miles in the rose joint on the accelerator pedal reversed itself, pinning the throttle open - cut the engine, righted it and waited for the now severely flooded twin 40's to allow starting. Huge belch of flame and we were off again. Fuel gauge was wired up wrong, reading from empty to full, and with random movements up and down meant zero trust, so I stopped at just about every fuel stop due to having no clue how much was in there, nor how quickly the 1600 twin port air-cooled vdub motor running twin solex 40 carbs that was roaring away behind my head would eat the fuel!

As it got dark, the total lack of visibility to the rear became even more apparent, and at the Dartford tolls trying to get the roof up and reach the booth from a car with a max height of 42" was 'interesting'! The operator nearly fell out trying to take my money - and I could have just driven under the barrier if I wanted anyway!


Anyway - she was home!


to be cont...


__________________


Veteran Member

Status: Offline
Posts: 44
Date:
Permalink  
 

...cont


So for the next year or so I used her as a weekend fun car, but she was running less and less cleanly, and occasionally she'd just stop. I knew I was going to have to do something eventually, but I didn't want to stop driving her!


Anyway, eventually the inevitable happened - she stopped, properly. No amount of cleaning and coaxing was making headway, there was just nothing. And the leaking from the canopy was bad too, the interior was getting really nasty.


So I started working away from home, commuting long distances, and didn't find the time to get her sorted. So she sat, for a year.

Eventually I decided to bite the bullet and fix her, properly.


So into the garage she came;


I started stripping the interior, getting rid of anything wet. And looking for the reasons why things (like the fuel gauge) were 'temperamental'


The original builders wiring left me a little wide eye'd, and slightly daunted - at this point I still hadn't found a single fuse...


Side windows were perspex, and showing their 30+ years outside age - out they came for use as templates


Same for the headlight covers


A jumble of dash parts, seats and interior panels starts to build up


Another part in need of replacing - too many speed bumps for that one!


Battery, fluids and hydraulic systems up front in a vain attempt to balance out the weight distribution issues - every little helps!


By now I am very scared of the wiring, but am attempting to label it all up


Ahhh - there they are... they look in good nick, oh wait.. and I wonder what they are wired to...


Must think of a way to hide this, is ugly out on display.


Tracing this back tells me I don't have the original engine either, was a 1500 once


This discovery at once told me everything I needed to know about the original builder, and answered the sloppy gear change riddle - why bother to fabricate a mounting point for the gear linkage when you can tie it in place with an old shoelace and then fill the tunnel with expanding foam to hold it there...


Next - interior stripped out - what was that soggy carpet hiding??


__________________


Veteran Member

Status: Offline
Posts: 44
Date:
Permalink  
 

So - I finish stripping out the sodden interior, to find this waiting for me underneath;


The level of filler being used to hide the obviously old, pre existing, rot - rather than dealing with it - further enforces my opinion of the original builder - muppet


This car was MOT'd and on the road remember...


Obviously the water has puddled here, and for a long time.


So - out it comes then, I intended to keep as much as I could, only cutting out the truly rotten parts


I love the angle grinder a little bit too much btw..


At this point the picture diary drops out - the project nearly stopped completely to be honest, the sheer amount of tinworm really got me down. The filler had done it's job and hidden the problem, left it for someone else to deal with - me.


Luckily someone else in my street was building a beach buggy, and when one of his mates saw the Nova one day, then his infectious enthusiasm brought the project back to life.

He was far more knowledgeable about vdubs, and seeing the level of visible rot ensured me that removing the body was the only reasonable course of action to access the level of damage.

Many, many, many hours of grinding decades rusted bolts, and manually cutting through huge numbers of inaccessible body bolts by holding the bare hacksaw blade in my hands, getting numerous blisters, and eventually we were able to free the body from the chassis for the first time in 20+ years. Using motorbike tie down straps we hoisted the body up to the joists of the garage roof, and the full extent of the rot became visible.


Filth and rot


No wonder the pedals felt a bit squishy...


I've a funny feeling that was a jacking point, 'was' being the operative word!


The non-starter


The other 'jacking point'


The hoisting arrangement of ropes and tie downs - Heath Robinson would have been proud!


Anyway, at this point it was blindingly obvious that the floors had had it - so a quick phone call the Big Boys Toys (as it was then) secured a pair of new ones, fresh from Mexico.


Out with the old...


...in with the new :)


Next - 'Welding' (lol!)


__________________


Veteran Member

Status: Offline
Posts: 36
Date:
Permalink  
 

Never again will I ever complain about the narrow garage i operate out of.
Or Nissan rust issues.
I can understand why you were snagged by that design, despite being a sheep in wolf's clothing.
Kit car or not, it's a sexy beast.


-- Edited by Z_Karma on Tuesday 6th of December 2016 04:02:56 PM

__________________
Metric in the streets, SAE in the sheets.


Senior Member

Status: Offline
Posts: 112
Date:
Permalink  
 

Nice project. The old Beetles have charm, and they are simple and easy to fix (or so I've heard). :)

__________________

"There is also some pretty crazy people here too, and aiming for the top of that tree is Bad Obsession Motorsport."
"They say it can't be done, they might be right"


Veteran Member

Status: Offline
Posts: 44
Date:
Permalink  
 

So -this is really quite embarrassing to post all over the net lol, but it's part of the story!

I had never welding anything to anything before, but was game to give it a go


Basically, I was struggling to learn on the job, with progress appearing to go backwards with less welds taking, and the frustration of having to grind back and start over. With no-one to instruct, I basically tacked them in place and told myself I'd get a mobile welder to come and finish it later, so I moved on, still full of the frustration.


The next job was the remove the rear shocks as they were totally seized up -could I? Could I ***!


I swore, wheeled it back into my dads garage, and moved house.

Well I didn't move house because of the car lol, but it ended my progress.


I had no space where I was living (houseboat), little time with the long commute (around 120mile/day, every day, on one of the worlds busiest stretches of road, M25), and had run out of tools, skills and enthusiasm.


And then before I knew it 6 years passed...


Next - Venture Capitalism pays out


-- Edited by PaddyX21 on Wednesday 7th of December 2016 09:02:44 AM

__________________


Veteran Member

Status: Offline
Posts: 44
Date:
Permalink  
 

Z_Karma wrote:

Never again will I ever complain about the narrow garage i operate out of.
Or Nissan rust issues.
I can understand why you were snagged by that design, despite being a sheep in wolf's clothing.
Kit car or not, it's a sexy beast.


-- Edited by Z_Karma on Tuesday 6th of December 2016 04:02:56 PM


 Wait for it - there is a lot more to come! We have probably reached ~2005 in the story so far, the sheep has a little evolution still to go ;)


andsetinn wrote:

Nice project. The old Beetles have charm, and they are simple and easy to fix (or so I've heard). :)


 With the body off (be it standard beetle body, or fibreglass monstrosity) everything is easily accessed and it is all relatively simple. I can also see why people like them, but I can also understand why people hate them too!


__________________


Veteran Member

Status: Offline
Posts: 44
Date:
Permalink  
 

So, no pictures for this, but at some point in those 6 years, I took the engine off and disassembled it on the bench. 

It had been running mismatched heads all along, different valve sizes and everything. On top of this the fuel tank had rusted through and the fuel system had ingested large volumes of rusty water. Long story short, full rebuild was required, and I was quickly out of my depth without guidance. So it sat in a corner and grew spiders and corrosion. So did the 1641 cylinders and pistons I had bought for it. What a waste...


Anyway, jobs came and went, as did places to live. Long story short, mid terrace rented accommodation is not an environment I could (can) see myself being able to afford to move away from any time soon, which was leaving nowhere for the car to live.

So Xmas 2012 and a real stroke of luck happens - the company I work for was acquired by a huge multi-national corp, and all our share options paid out. Still with no tools or space, or skills if I'm honest, I decide to contract Southways Automotive to help me out.

Finally the project is moving again!


July 2013, and they come to pick up the car, I lower the body back onto the chassis for the first time in years and back out into the sunlight for the first time in what seems like forever


Onto the transport we go


And off to Southways.


Text captions that follow courtesy of Southways.


So the Nova then. Originally designed and produced as a kit by a company based down the road in Southampton called Automotive Design & Development, or ADD for short (yeah, yeah, it's not short of attention.....) in 1971. The car is basically that mental GRP shell bolted to the chassis of the original air-cooled VW Beetle.


Since ADD lasted until 1975 with the Nova design, having moved oop-North to Lancashire in 1973. The model was then bought by a Yorkshire-based company who ran production from 1978 to 1990. The particular Nova is a mk2 model, and produced in 1980, and believe it or not, the Nova is still being produced in India as an electric powered-car! 


The Nova has come to us for extensive work, both chassis and body/canopy related. And sans engine.....


The ****pit of a Nova is normally pretty-much 1970's supercar style, only this one needs a little bit of elbow grease!


The Nova enters the workshop and tries to look evil.


More to follow, I don't know if there is a post size limiter, so I'm doing this in sections :)


__________________


Veteran Member

Status: Offline
Posts: 44
Date:
Permalink  
 

A Sierra XR4i on modern roads full of monotonous egg-boxes on wheels stands out as being pretty different. But park one next to a Nova (in fact park most things next to a Nova) and they might as well be a Kia Rio!


The Nova enters the '70's zone, along with Hilda the Imp.


The Nova has come to us in bits, because our customer, having owned the car some years already, decided once he would have a go at taking it apart of refurbing it himself, once the time came. He has indeed taken it apart, but that's where work stopped! This is good for us, however, because all we need to do is heave! 


If only a Griffith was that easy!


Don't normally get an interior view from below ground level!


Nova comes equipped with uber-cool wheels. Revolutions maybe? Answers on a postcard!

Paddy: They are Revolutions, 15x6 front 15x9 rear


Apparently it is so


The main reason the body was originally removed by the customer was because the floors had rusted through; being able to put your feet on the tarmac at speed isn't as exciting as it sounds.


The Nova needed new floors. Now we're a fan of people having a go, but the risk is that if things are going wrong, for whatever reason, people sometimes don't know when to stop.


Thankfully that isn't the case here. Our client rolled up his sleeves, had a go, and when it became apparent it wasn't going to plan, he just downed tools again and decided to get someone to do it for him! That, is a wise move! Welding is easy to learn, but it's trickier to learn to weld neatly AND with good strength. And trying to weld thin plate steel as a novice is pretty-much the trickiest thing you can try on a car. So hats off to our man for putting the torch down! Practice makes perfect, but he wasn't willing to practice on his floor!


Having removed the floor panels to clean up, more rot has been spotted across this brace at the front of the chassis. This is a standard Beetle panel.


More stress cracks found near corrosion hot spots.


Inside the backbone of the chassis. We think (so far) that this corrosion is the remains of a previous panel which may have already been replaced, so it's possible this looks much worse than it is.


We've decided to best route here is to take the chassis to the guys we get to blast our TVR chassis'. Then when the Beetle chassis returns, we've got a much better starting point. Overall the chassis looks solid, but there are one or two problem areas.


__________________


Veteran Member

Status: Offline
Posts: 44
Date:
Permalink  


This being a 1500 model Beetle chassis, it doesn't have the MacPherson strut arrangement on the front end. Torsion bars are the order of the day.


With the floors removed, it's onto the ramp to start stripping it down. We don't what the gearbox going in a grit-blaster!


Amazing how basic it is! 


Torsion bar at the rear too, only linked rather than independent.


Gearbox oil in the brake drum....not ideal for a responsive stopper!


Beetle gearbox awaits engine......but which engine will it be?!


Gearbox and rear axle off!


Almost bare enough for the blasting process. Once the chassis is refurbed, we will likely coat it with POR15 rather than getting it thermally zinc treated and powdercoated as we do with the TVR chassis', as in this instance POR15 is going to suit the large flat surfaces better.


Gearbox and half-shafts await cleaning.


Front torsion beams awaiting cleaning. We'll fit new seals/bearings were applicable.


Next time we see this it should look different! 


__________________


Veteran Member

Status: Offline
Posts: 44
Date:
Permalink  
 

So the Nova's (or Beetle's) chassis returns from its session with the blaster.


Rot. To be fair, this was expected. We had a feeling this panel was no good.


Didn't realise it was as bad as that, but hey.


Looks like Clarkson was asking to cut those holes out!


And that one. With his teeth by the look of it!


Wow. Same panel as the other side but again worse than we thought it'd be. Wasn't much strength in the area you'd be stamping on the brake pedal!


Oh, it's even started working it's way into the main chassis backbone section. Looks a bit thin!


Front beam looks nice though.


Oh! Erm.....ah, well that's shot then!


That's really not happy! No matter; replacements are available off the shelf.


Just as well as this one's had a dodgy repair up top too.


Yeah.....very nice.


Back end looking ok, which is a relief. Better flip it over to be sure the underside is ok....


Oh...


Erm.....


Might just be coincedence that the metal feels thin around that holey area?


Pretty sure that was a jacking point!


Good news! Anti-roll bar is fine!! But in seriousness, some thinking to do here; repair this chassis, or buy a new heritage chassis? Let's wait and see!


__________________


Veteran Member

Status: Offline
Posts: 44
Date:
Permalink  
 

Oooh....good news! That new USB flash drive I ordered from eBay looks to have arrived!


Nope, it wasn't. Weird....really looked like one inside the wrapping! So, yeah, a new chassis. Why? Well after it's session with the shot-blasters, the last one looked like a cheesegrater, frankly. Even if we'd have put right everything that was visibly wrong, there would have been plenty more under the skin that wasn't right. It's not a tubular spaceframe, afterall. And with replacement heritage items available off the shelf, it's a no brainer. New chassis for the Nova!


This is one of the latest versions available. They're not current in production now (we're informed) but this is a Mexican spec version. Looks like they swear by seam-sealer!


A Nova uses a Beetle chassis, it's true. Thankfully nothing structurally needs alteration, it's a straight fit. However, one area that does need work are the floor panels; if you lower the roofline by a foot, you'll need to sink the seats a bit lower too!


Fort Fareham is exactly what the name suggest - an old war Ford. A Palmerstone Fort to be exactly, built around the mid-1800's. At some point along the line, somebody must have planted a VW Beetle, because there appears to be one growing outside! Must be like roses...


Floor sinking in progress. That looks pretty easy and basic.....it wasn't! It was all sorts of funny shapes before!


Not that it'll be noticable, but it's a bonus that this will add strength to the floors.


Coming along nicely.


One of the modifications you have to make to the Nova chassis is to move the gear lever housing. Luckily you just cut two sections out and switch them over!


You have to shorten the gear linkage too....turns out the guy who did it originally measured it wrong!


__________________


Veteran Member

Status: Offline
Posts: 44
Date:
Permalink  
 

Sunken floors welded in and treated with anti-rust primer.


Applying the first coat of chassis paint, which in this project is POR15


Always looks nice!


And amazingly, that's not the top coat!


Once the chassis had been painted, we refitted the rear suspension blades with new seal covers.


Attention moves on to improving the pedal operation and fitting the new dual circuit brake master cylinder (original was only single-circuit).


You can't see it, but there's a massively improved gear linkage in there!


Does it need a new fuel tank? 


Yes. Yes it does.


The Nova body is mounted to the chassis with fibreglass 'lugs'. Most of these were pretty mashed, so we've been reinforcing them with layers of GRP in preperation for the day the body links up with the new chassis.


Another body mount.


We weren't sure if the old wiring loom was best in the car, or in a box. We went for box.


These hydraulic hoses are the feed and return for the struts that open the canopy. Does your car have hydraulic hoses running to struts to operate a canopy? No it doesn't, it just has doors. Now go away and think about that. 


The lower side panels *might* need some improvements before they're refitted! 


__________________


Veteran Member

Status: Offline
Posts: 44
Date:
Permalink  
 

Time for hydraulics.


Pretty much everything that isn't a new chassis, but fitted to the chassis has been through the sand-blaster, and hung out to dry once painted! 


There are Nova bits everywhere, all waiting to make a black mark on a passer-by's trousers. 


Assembly begins on a rear chassis/gearbox stabiliser. There is rumour (a fairly good rumour) that the Nova will be returning to the streets of Kent with more than a wheezy Beetle engine. This means certain components will need beefing up to deal with it.


The brace runs between the rear damper mounts, the chassis and the gearbox, which of course the engine hangs off of (literally!)


It all comes in bits and has to be welded together. Each kit is built to fit the car.


Brace taking shape. Lots of billet-alloy parts always end up looking sweet!


__________________


Veteran Member

Status: Offline
Posts: 44
Date:
Permalink  
 

Nova rebuild parts list: Heritage chassis? Check. New front suspension beam? Check. Red 9 coilovers? Check. Subaru Legacy? Check. Wait what????


Perfectly normal to add another car to your parts list. Like the Imp project we're running, we've gone and got a donor car in for its engine. The engine in this case, is the EJ25D....in other words a naturally aspirated, 2500cc flat four producing either 155bhp or 165bhp. We'll tell you which of the two it is when we've taken the rocker covers off and checked to see whether it has hydraulic tappets, or shimmed valve clearances. Either way, with the old wheezy Beetle lump probably struggling to muster enough grunt to drive a slimline wedge-shaped car into a slight headwind (on a good day....possibly 50-60bhp) this is going to provide 'slight' performance increase.


With increased power comes increased responsibility......


This brace is designed for Beetles with grunt (presumably ones with Subaru engines!) and mounts between the chassis and shock absorber mounts. It reinforces the area the transmission transits the most torque through.


To go with this new brace, adjustable Spax dampers, as we all know Patrick didn't like the old ones!


Same stuff that fuels Superman?


Just need two short bits of string and a seat, and that'll make a cracking swing for a gerbil.


December has been a quieter month for the Nova - we're waiting for quite a few big ticket items to arrive, but in the meantime the gearbox has been cleaned, halfshafts assembled with new seals and bearings etc and the whole assembly has been refitted to the chassis.


It's just waiting for a 2500cc Scooby lump to hang off of the back of it now!


So with the gearbox back in and all braced up, we're looking to the powerplant...


And it's gone! Easy! (In fact, not easy. Was a complete pig to remove!)


Here's the EJ25 sitting on a stand. So far 2 people have asked what it is, and when we tell them it's going in the Nova they go all wide-eyed!


Two go left, two go right. Easy.


It's not just the engine the Legacy is given its life for. We're harvesting the wiring loom too. The whole thing. Yes, really.


Bit by bit we pick it out of the car...


Until it's all there. Bear with us, there is method to the madness.


See, the thing is the Nova is a rear engined car, with no doors and a hydraulically operated canopy. It's got arms where it should have legs and so on. A standard universal kit-car loom is primarily designed for a front-engined car, so you'd have go spend lots of time completely changing most of it to suit the Nova's unusual requirements. So if we're going to chop and change, we might as well chop and change Subaru's loom, and use as much as we can in terms of fuse boxes, relay cases and so on. It'll be as close to a Subaru (wiring-wise) as we can get it. And sadly that's all we've got for now on the Nova, as wiring is a painfully time consuming job as we haven't had time to do anything more exciting!


__________________


Veteran Member

Status: Offline
Posts: 44
Date:
Permalink  
 

With work on the wiring loom proving a slow, arduous task (mainly due to the fact we CANNOT find a wiring diagram for that particular model of Legacy) we switch attention to the EJ25. There are a few mods to sort to adapt it into the Beetle chassis, it needs the head gaskets changing (common issue on this vintage, apparently) and it needs cleaning and painting. And we'll renew that monster cambelt too!


Inlet manifold off.


Exhaust headers off.


First mod to sort was this water jacket. The eagle eyed of you will notice it's now pointing the other way. That's because it needs to in order to fit the Beetle layout (remember we're going to have to fit a wet cooling system to this). All that needed modding was the angle of entry from the top hose, as it would have fouled the engine block otherwise.


Awwww.....it looks like a tiny engine there! 


Valvegear arrangement confirms this is the 155bhp version of the EJ25. Ah balls! Only 155bhp....hardly any more than the original 35ish! 


I only have two cylinders on the shelf, but if sir would like I might have two more round the back.


Cylinders in good nick. Which is good.


Sump pan had to come off, as it'll end up sitting on the ground if installed into the Beetle chassis.....


....so we cut it up! It needs to be shorter, but still hold sufficient oil. Cue the hammer! 


Bend a bit there...


Add a bit there...


And it's done! Better weld it up!


While the sump pan is being "adjusted", the front axle has been receiving attention. It's a new unit, as the original was....well, you saw it! It's been fully prepped and painted too, and has a reconditioned steering box fitted, as well as Red9 design rigid sway bars to replace the torsion bars. These will aid the adjustable coilovers that will shortly be fitted.


With the swing arm in place, we'll just pop the coilover in and repeat the same the other sid................oh.


Ah. That doesn't fit! Turns out the replacement front beams are thicker than some of the originals, meaning the coilover unit is fouling the beam before it gets near engaging the strut fully. Looks like we'll be cutty-cutty shortly then! 


After weeks/months of waiting, we got a letter from customs that actually made us happy the other day. Some stuff had come in from the USA, and it was destined for the Nova! Now we've seen a sexy adapter plate being used on the Imp project, but the Nova needed one of it's own. Unlike the Imp project, this adapter is readily available from the states - you don't even have to design it from scratch! Bonus! 


Though it did take ages to arrive! Anyway, it's here now. First things first.....fit the studs.


Second.....something we didn't see coming. Turns out there was a conflict of interests by two different companies here. One company made the strengthening brace which cradles the gearbox and triangulates the rear suspension/engine mounting setup. The other is this adapter plate, made by a totally different company and built to fit Subaru engines to bug gearboxes. But guess which two parts clashed? Yup....off with the brace, out with the grinder! 


Luckily we only had to shave a couple of mm from these poly bush mounts and this cradle, so in the end it was only a time penalty to the project, rather than a real head scratcher (we've got enough of those already!)


__________________


Veteran Member

Status: Offline
Posts: 44
Date:
Permalink  
 

Adapter plate fitted. Luckily it actually fitted! And before anyone asks, yes we did try it on the Subaru bits too...and yes it fitted!


Tight fit, but it's all ok now.


Also in the Subaru conversion kit, this nifty lightweight reduction gear starter motor.


Check out this flywheel! Look normal?


Not from this angle! This is because the flywheel sits BEHIND the adapter plate. Good job this was a production part, as the costs to get that custom made would be astronomical!


And here's the clutch. Everything goes together, lovely. Next step......clean the engine block and make it look all pretty. And find out where the hell that sump pan has got to!


Some of you may remember we had an issue with the new coilovers fouling the new front beam - you remember right. This is what we've had to do!


You'll have to excuse the pictures - I left Steve with the camera. He got some of it in shot...


Finished up! Coated in PU sealant for now, we won't know if it's worked properly until it's all back on the ground. According to our measurements it has!


Meanwhile back in EJ25 land.....sump has been shortened. Oil pump pickup decided it didn't want to fit. Got chopped off.


Sump is now welded up and ready to rock.


This is where the oil pickup will go.


Cams back in, valve clearances set.


Oil pump pickup modification complete.


Sump dressed and brush painted. Yup, BRUSH painted! Doesn't look it, does it?! It's wet here, mind, but how will it dry?


More paint splashes onto the shores.


Modified coolant manifold has been blasted and painted silver. Engine is Ford red enamel.


Went silver for the rocker covers too, seeing as they're alloy. Red for old school VW type engine colour, but mixing it with modern silver parts to highlight the Subaru twist. Or, just because the silver paint sprays well.....you decide!


Looks good though, no?


Sump dry. POR15 is good stuff!!


The sump we get so passionate about is fitted!


__________________


Veteran Member

Status: Offline
Posts: 44
Date:
Permalink  
 

Engine is.......an engine! It's complete!


KEP flywheel fitted. Check.


KEP clutch kit fitted. Check.


Weigh distribution of chassis totally screwed by bolting engine on right at the back. Check (but that's how they're meant to be!)


Last piece of the KEP puzzle, a reduction gear starter motor. Comes as part of the kit, weighs half as much as a standard starter and looks cool to boot. Shame it'll be hidden!


Chassis is pretty much ready to start thinking about bringing the body back down! 


__________________


Veteran Member

Status: Offline
Posts: 44
Date:
Permalink  


Two different attempts at putting engines that aren't supposed to be in the back, in the back. Which is better? Only one way to find out.............


Coilovers now fitted at the front, along with new steering box.


Touchdown! Body lands! 


Some work to be doing, but it's a big step in the project. We've got some tidying of the body and some fibreglass repairs to carry out, along with the small tasks of cooling systems, wiring, interior, canopy.........there's a fair bit to do! 


Time to progress the Nova in ways that will make it look no different externally whatsoever....


The 'you're not meant to have that engine' corner!


So we've got a crackin' flat-4 banger from Subaru here, but what we really need is to make it run. First thing we need for that....wiring. Cue fun times....


All the loom you see going into the Nova has been harvested from the Legacy donor car. there will be the odd strip here and there which has been added, but although it took a while to remove it all from the Subaru, it means the original wiring pinouts and connectors can be kept, meaning the majority of it will be compatible with Subaru wiring diagrams. Great..........as long as you can find them!!


So here's a strip of loom that used to go to the front of a Legacy going to the rear of a GRP bodied wedge with a jet-fighter ****pit!


Original Subaru ECU mount, heavily modified (it used to have legs!)


We'd done plenty of pre-work on the engine loom, so this is a case of getting the body loom to meet with the engine loom, and then shortening/lengthening as required and keeping it all looking like ADD were a mass-manufacturer and that it came from an assembly line. Or at least, that's the target!


Insert custom designed fuel tank here


More fuseboxes and control panels find their way into the Nova. They'll be easier to get to in here....you just move the seat forwards!


So there we have it.....wiring! Never promised it'd be exciting, but it's one of the most important aspects of the build. So far, it's going very nicely too!


__________________


Veteran Member

Status: Offline
Posts: 44
Date:
Permalink  
 

First thing we did last week - take a grinder to the front.............boot??


Making fibreglass dust.


And removed! Now what?


We did it for airflow, as we need to fit a radiator - something the Beetle didn't have (unless you were trying to wind up a partsman at your local factors at 4:47pm on a Friday). But there is no airflow there, which means the bottom section also needs cutting open


One radiator! We did toy with the idea of fitting the Legacy's rad, as it's obviously fit for the job. However, sadly it didn't fit. Happily, this one did, and it's from another Legacy, only not the one we used as a donor. But like it. Just not the same. Make sense?


The lower nose section will be chopped and a 'tunnel' created for the air to travel through. We will then work out how to expell the hot air, being that for a decent cooling system, you need an air around a third bigger than the entry cross-section. Hot air expands, and all that physics jazz.


Moving inside, the dash is placed back in place to allow us to mock-up some wiring looms. Got some bits missing here!


Ah, that'll be useful!


Anyone fancy some wiring? It's pretty straightforward! Really? Nobody??


Much the same as the last time I stood in this spot and took a picture, only with slightly more wires.


Making its way underneath the car now, too. This area will be hidden by the side pods once complete.


__________________


Veteran Member

Status: Offline
Posts: 44
Date:
Permalink  
 

Here we have a nifty little piece of kit! it's a speedo module which hooks up to the original Beetle speedo cable and converts it into an electronic signal. This is ideal for Beetles running a stand-alone ECU, as it can take a speed input. The cable would normally carry on the other side, but in our case our new speedo is electronic, not cable operated. So we'll have end of this plugged into the speedo cable, and the wire to the ECU, and then a little spindle on the other end twirling away happily catching bits of wiring loom and ingesting dirt. Great!


So what we'll do is get a piece of nylon, and pop it on the lathe. Then we'll make a really odd shape, and connect it to the other end.


Ta da! it'll be buzzing its nuts off in there and nobody will be any the wiser! 


Moving onwards, it's time to tackle a biggie......cooling system! Being based on Hitler's only lovechild, the Nova doesn't have a cooling system as such, not a wet one anyway! The Subaru engine has a proper cooling system, so we'll need to modify the car to suit, and that begins with drawing on the front of it!


Like so.


And then cutting that section out, like so.


Then we make a frame to sit the radiator in. We've gone for a Legacy radiator, though it's not the version from the model we broke up as we wanted one with a central top hose position.


Radiator goes on here, like this.


Make sure it all fits nicely.


Then go about fitting the new frame in the nose of the Nova, now offered up the the car.


Yup, that works! Radiator will be at a hell of an angle, so we'll need to duct the airflow into it. We could have used a smaller rad and got it more upright, but then there's a good chance it wouldn't be man enough for the 2500cc iron-blocked Boxer lump.


The cradle bolts into the nose.


Now the ducting!


Carve bits of foam up to create the shape required.


Slot them into place.


Keep going until you've done it all (takes quite a long time!)


There, all ready for lay-up in fibreglass.


It'll change the look of the front slightly, but in my eyes at least, for the better! next time we update, it should have been layered-up in GRP.


__________________


Veteran Member

Status: Offline
Posts: 44
Date:
Permalink  
 

We've used the foam templates to lay some fibreglass matting down.


Kinda like wallpapering, only more itchy!


Some resin and gelcoat later....


In the meantime, we're bracing the front end. The Nova's body isn't exactly strong, and we're concerned the added weight of a big radiator full of water won't do the nosecone any good, so we're bracing it.


We decided to fashion some adjustable braces too, using rosejoints. This means once it's all finally fitted, it can be adjusted on the front end to get the panel alignment just right, as well as reducing the stress on the nosecone.


And it'll look something like this!


__________________


Veteran Member

Status: Offline
Posts: 44
Date:
Permalink  
 

Work has continued on the cooling system. The final hoses will be new types, but for now, this is how the radiator plumbing is coming together.


Coolant hoses will pass under the chassis, conveniently nestled between the sunken floors we had to fit to the Beetle chassis.


At the rear, they branch off either side of the engine. There will be more to add on to both ends.


Well, it's not right now..... 


Layout of the coolant piping, back to front


Same again, t'other way around


Clamps fabricated to stop them moving around.


__________________


Veteran Member

Status: Offline
Posts: 44
Date:
Permalink  
 

March 2015

Out with the old and in with the shiny new!


I have a set of mk1 MX5 seats for starting to sort the seating position out, and the position of dials etc so that they can actually be seen from the nigh on laying down seating position!


Steering column support fabricated in a two piece design to mate with the body and chassis at the centre tunnel.


Dash face fabricated in aluminium sheeting.


Steering column re-fitted.


Air con mock up for positioning of the unit itself, and how the ducting / pipework will interface with the previous system (not much to be fair!). Looking at mounting to underside of passengers side of the dash module, directly interfacing with the screen de-misting pipework that already exists and then fabricating routing for the dash face (single central outlet) and foot wells (outer tub wall, one per side). The compressor from the donor legacy has been refitted to the engine, although the pipework fittings will require custom fabrication that hasn't happened yet. Should be easy to fit a standard condenser into the nose without too much hassle.


I have the wheels now, and I will be buying new centre caps from the OEM, as they have a variety of caps, lids, and an aerosol paint lid in one, being used as caps currently! When I get paid (Friday) they will go in for refurb to bring them back to a beautiful gloss black / diamond cut finish.


Lets see what else...

...oh yeah - scheduled in some time on the ramp to lift the body back off high enough to get the new fuel tank in and mounted up, then the body can be bonded and bolted back into place permanently, or at least for another 40 years!


Drawings all made up for the custom silicone elbows etc for the coolant pipework. I need to choose now on whether to use a water based (i.e. normal) coolant, or bite the bullet expense wise and go straight for Evans Waterless Coolant. Once that stuff is in there then it'll never need changing, and as it has 0 vapour pressure then there will be no strain on the pipework, and as it has no water then there will be no corrosion, ever. Isn't cheap though. Probably will, it fits with my trying to make this build last another 40 years.


I'll buy the new hydraulics subsystem this month as well, having sourced a supplier that can provide a suitable system off the shelf. Then we can check all the canopy workings out for any issues that may have arisen.


__________________


Veteran Member

Status: Offline
Posts: 44
Date:
Permalink  
 

Got the wheels back from the refurbishers

Mmmmmmm... Shiney...


__________________


Veteran Member

Status: Offline
Posts: 44
Date:
Permalink  
 

And some more gratuitous wheel photos now that revolution have kindly obliged with new centre caps :)

(I'll, probably, stop banging on about the wheels after this, honest...)


Should be some proper progress photos coming up in the near future :)


__________________


Veteran Member

Status: Offline
Posts: 44
Date:
Permalink  
 

Update time :)

Words and images courtesy of Southways again


This Nova's going to be a completely different car to drive! We decided we really weren't happy with the driving position as it was designed, not to mention the fact the steering column was fixed to a flimsy bit of GRP, so set about making a brace to both support the column, and allow it to mount very slightly higher.


This is what we came up with.


The rusty bit was the original mount.


Now the column sits about the height of that square tube, erm, higher.


With the column raised, attention turned to the dash and steering wheel. The original shirt button was something our customer was keen to get rid of, so for mock-up purposes we attached this wheel (a used spark plug to anyone who can identify it). The driving position is instantly better. It's almost as good as a Lamborghini Espada, which doesn't sound like high praise to anyone other than those who sat in the Nova previously.....


The dials are mocked up. Easy way to design the dash - print them off and stick them on until you're happy with the layout. That's when you get the drill out!


We have a new engine in the Nova, we have most of a cooling system, a heap of wiring and some uprated suspension. We even have stick-on dials! But we don't have a fuel tank....until now. Doesn't fit very well, mind....


.....Ah! Turn it round the other way!


The tank was actually a custom-designed unit, so it's bespoke for the Nova.


It includes a sump, so if our customer is ever brave enough to hurl it around corners as fast as it'll go in a straight line, fuel starvation will not be one of his worries. He'll have MASSIVE problems in many other areas, but the fuel will continue to pump even as the car exits the brick wall and is halfway up the tree.


Final lacing for some of the loom. The body will go back on soon, and not come back off!


Take a final look at it!


Looks a bit different under the nose now. That's where the rad will sit.


And it's now a car! Body back on, and going nowhere as we've now sealed it as well as bolted it. Should add strength, eliminate squeaks and creaks and keep it water-tight.


Body back on, and going nowhere as we've now sealed it as well as bolted it. Should add strength, eliminate squeaks and creaks and keep it water-tight


Bit of a gap at the rear arches though, so we'll have to plug that with something. Maybe a seatbelt mount, seeing as that rough hole in the GRP is actually where the seatbelt used to mount!


That's the upper section! Note to Nova owners.....don't crash, unless you've improved this aspect of the design. Actually no, still don't crash! We'll come up with something for this.


__________________


Veteran Member

Status: Offline
Posts: 44
Date:
Permalink  
 

We've been working on the nose of the Nova recently. Here's the front lower valance being fitted after we'd gone round the whole thing putting strength back into it with GRP, and filling in all the original holes along the upper lip, which used to give access to self-tappers. We're not using any of that now, we're going to do it properly with hidden bolts and nyloc nuts!


The radiator mounting frame and nose-support brace we made trial fitted after powdercoating. The powdercoaters remarks were "What part of a TVR is that then?"


The brace is needed because, frankly, there's not much strength in a Nova body, especially the nose area. As soon as we pop a radiator big enough to deal with 2500cc in there, and then fill it with coolant, something's going to give! The new brace will spread the load of this to the front of the chassis, as well as providing a way to adjust the load on the nosecone and alter the sitting position.


Meanwhile, on top of the pointy nose we needed a way of keeping the bonnet secure. The original layout was two great big old-school big pins, and they really didn't look great, so we've installed some aeroquip catches instead. The car will be staying black, so they're fairly well disguised and we figured it probably needs the additional security of these catches rather than just the lock at the bottom due to the fact a previous owner had fitted them! We can remove and smooth over the hole where the bottom lock went, as it all needs removing and refitting when it's painted.


The beast beneath the bonnet? Nope, wrong end! But here you can see where the bonnet affixes...


....and the new battery mount we've begun to fabricate.


The open mouth (which never used to be open, you'll remember) being smoothed and fettled.


We need to fit the grille before the radiator, which means we need to get the area surrounding the mouth nice and neat, as it'll be too difficult to access it once the grille's in place. We could, of course, fit everything, get it all running, and then pull it all apart to get it painted of course!


So far, so good. I think the Nova's beginning to smile!


__________________


Veteran Member

Status: Offline
Posts: 44
Date:
Permalink  
 

The Nova's had a good month! Most of the work in September centred around lighting. Having carried out a fair number of improvements to the alignment of the rear lighting panel (and then failing to co-ordinate enough to get pictures....DOH!) we turned our attention to the headlamps. Our customer Patrick had already expressed his dislike of the original setup the Nova had (still visible on the previous image). All of the headlamp brackets were not only rusted, they were visible! Along with the side and indicator lamps looking like they were thrown in from 10ft away, it was deemed necessary to improve this area.


To that end, a plan was hatched to fabricate some cowlings and enclose the headlamp units. The indicators will be relocated to the grille, and the sidelamps will be an LED unit positioned next to the headlamp. First things first, we needed to make the cowlings. Foam cowlings? No, this is how we made the shape initially!


Best way of designing the cowlings to encase the headlamp neatly is to actually encase the headlamp! We'll get it back out ok though.


The foam was then layed up in GRP matting before the resin was applied. The result was this! 


And this! Same both sides, of course! They'll need some more strengthening on the back and some smoothing on the front, prior to paint. Then we need to engineer them to be removable, as the headlamp adjustment is carried out from the front. We've already made one of the new perspex covers (mostly to make sure the new cowlings clear them!) and have fitted all the new fixings for those, but we'll cover those more at a later date.


They've improved the look of the front end no end though!


__________________


Veteran Member

Status: Offline
Posts: 44
Date:
Permalink  
 

So - an (October 2015) update that doesn't include pictures :( but does contain some good news :)


Mrs. Paddy is pregnant! :scared:


This was very much part of our long term plans, and I am very happy about it, we have had several miscarriages and were somewhat disheartened. We have a provisional due date in May.


I guess there's never a 'good' time really, but I am now going to undergoing a re-arrangement of my priorities, and the Nova is one of those.


But (in the voice of Bob Calvert) 'Do Not Panic'!

This is good news for the Nova - we are now going to prioritise getting the car on the road over making everything perfect and pretty. The sooner we can get the car working and MOT'd then the more time we will have to do the fettling and making nice before May's hard deadline.


Our general feeling is that this should be achievable without too much problem.


This means that another Nova will be back on the road for 2016!


__________________


Veteran Member

Status: Offline
Posts: 44
Date:
Permalink  
 

IT'S ALIVE!!
MWHAHAHAHHAHAA!


__________________


Veteran Member

Status: Offline
Posts: 44
Date:
Permalink  
 

Realised I had one of Rich's Facebook updates that I haven't transferred here yet, and also a few extra pics that I took during the engine starting day.


Nova update time! First up, goodies! Who doesn't love opening a freshly delivered box of car parts?!


Fuel pump and filter fitted into rather lovely anodised mounting bracket.


Hydraulic roof pump fitted. This is a different version to the original, which made a bit of a racket. This one should be pretty quiet.


Here's an addition to the standard setup - a flow restrictor valve. The new pump features a cut-off valve, which would be activated when trying to close the roof as the weight of the roof would try and force the fluid back through the valve at too high a pressure. The valve would then shut, then immediately open again as the pressure would be lost when it shut. At that point, it would shut again, because the same thing would happen again. So basically, though the roof would smoothly lift away from the body, it would come down again in a series of jerky moments. Not ideal. This valve can restrict the flow of the oil, meaning the pump doesn't get overcome while closing the roof, and the whole affair operates smoothly.


Coolant hoses largely fitted. Only the heater hoses prevent the system being filled with coolant.


Starter feed cable fitted. Might be time to think about seeing if we can coax the big Subaru boxer into life!


Fuel tank's full of fuel.


We don't have any gauges at the moment, but it's sensible to keep track of the oil pressure, so we've rigged one of the gauges up to monitor the situation.


Of course, the Subaru Legacy didn't have any provisions for an oil pressure sender, as there was no oil pressure gauge, only a warning lamp. To compound the problem, it's not actually possible to fit an adapter in the original oil pressure switch opening in the block either, as there isn't room under the inlet manifold. What we've done is rig up a braided hose from the porting in the block to meet up with the required adapter, which housing both oil pressure switch and oil pressure sender. It's then remotely mounted on the alternator bracket.


Coolant pipes plumbed in. No coolant in them, of course, so if we do get the thing running it will be brief!


We had to rig up the original Subaru header system as otherwise there was no way to mount the lambda sensors.


The Subaru exhaust won't do for the Nova, sadly. As you can see, it hangs a bit too low. The engine was mounted fairly high up in the Legacy.


Additionally, where we've had to shorten the sump as the original Legacy one was too deep, it shows just how exposed the exhaust would be. Going to be a custom job for this by the looks of things.


That fancy fuel pump bracket's fitted and ready to go!


Only left is to turn the key! Did it work?


While the engine goings on are.....well, going on, it's time to think about making the Nova a more comfortable place to sit. Not in terms of seats, in terms of humidity.


You see, you can't open the windows in a Nova. There's a tiny pop up sunroof and one or two aperatures where a minute volume of air can pass through, but on the whole it's a pretty unpleasant experiences on a hot day, according to our man Patrick. So with that in mind: Air-Con!


This compact evaporator unit will provide a steady stream of cool dry air for those days where sitting in a huge black triangle with a large windscreen become an issue!


__________________


Veteran Member

Status: Offline
Posts: 44
Date:
Permalink  
 

And the extra photo's I took while there :)


VW Heritage Rubber that has disintegrated away to nothing before ever even taking any use!


Bracket for pump and filter again


Upper seatbelt mounting bracket, rear side


Same, lower one, also forming a blanking plate to block off the exposed area/gap between body and chassis.


Air filter (not sure what exactly I was attempting to show here, sorry!)


Engine looks pretty awesome in there!


Upper seat belt bracket, other side


and Lower


Hydraproducts hydraulic powerpack unit - spec'd to match the Smiths unit as closely as possible


Battery tray requires a little bracing, as the original plan was to have the hydraulic pp mounted to the underside, but it didn't quite fit. Under bonnet area is coming together though :)


Underside of dash, with AC unit mounted under the passengers side. Dash top will be being flocked eventually to help reduce reflection


And finally a pic from the video taking position


Sent from my Nexus 6 using Tapatalk


__________________


Veteran Member

Status: Offline
Posts: 44
Date:
Permalink  
 

Few pic's from over the Xmas period.


We had to pull the engine again unfortunately, had to find the extreme blow-by on number one cylinder.

To get the pistons out you need to take each piston to BDC, remove a bung in the side of the block and remove the circlip & gudgeon pin.


Pulled the no 1 piston (not an easy task as you have to make some form of slide hammer to pull the gudgeon pin).

Anyway it's out and the top piston ring was completely seized in its groove. Managed to get most of it moving but a small section refuses to come clear. Its been soaked in release oil, levered, heated but still won't move. Trying much harder would break it so left it under load for the rest of the weekend to see if it popped out.

The compression problem would not have been helped by the ring gaps being in line.


Eventually got the ring out.

I suspect they are not cast iron as they are only 1.2mm thick so would probably not have snapped.

The bores look nice with complete and visible hone marks so I'm just going to replace the rings.


The rest of the pistons came out too, so in the process of cleaning them.

What I found matches the leak down test I did which was two cylinders with no problem so these came out with nice free moving rings. One with some leakage came out with a part seized top ring. The one with the worst leak the top ring was completely seized and took me some while to get it free.


Will get on and order the bits.


Been moving the dash on a bit.


Then the centre console.

The GF console is not looking its best having been hacked about several times in its life and now the gear shift is even further back. So I've made some side cheeks which will be vinyl covered and a recessed middle insert which will also be vinyl covered.


Front face will include controls for heater and possibly cigar and USB sockets as the recess will lend itself nicely to stowing bits and bobs such as mobile phones.


Slightly re-hashing someone else's wording so it make sense, but still doesn't flow very well, apologies!


__________________


Veteran Member

Status: Offline
Posts: 44
Date:
Permalink  
 

Few more pictures to stare at 


A while since the last Nova update! We don't have many pictures to hand at the moment (not only is it a challenge to get pictures taken, but the kind of work we've been doing doesn't lend itself to pictures very well!) Even so, here's the dash face cut out and mocked up in the dashboard.


Next stage: Cake making!


Not quite, it's a glovebox!


Thanks to the lack of room behind the dash, it's just about big enough to fit a pair of gloves inside. But, it's more than it had before at least!


And while we're at it, the dials are in!


Here's what we've mostly been working on - the business end of the dashboard. Specifically, all the interior wiring. And there's a lot of it on this car now!


We'll rig up the dashboard so that it's possible to remove it by just unplugging a couple of connectors, rather than having to unplug every switch and gauge one by one (ala TVR.....!)


There are relays. Lots of relays. Relays to control relays! When this thing powers up, it's going to sound like a field full of crickets! 


Or should that say 'door'? It's kinda the same thing....


Spot of plumbing? Nope, not waterworks....air vents!


An advantage of the Beetle running gear - cost. We have new bearings, new pads, new discs and new calipers, both sides......less than £150!


The Nova's at a stage where we could fit the wheels, and take it off the dolly. In theory, it would run and drive too, but we need to crack on and get all the wiring done before any of that happens. And it's taking a long, long time. Will be worth it all at the end though! 


I'll admit I'm getting annoyingly impatient now lol!


__________________


Veteran Member

Status: Offline
Posts: 44
Date:
Permalink  
 

March 2016

It's not looking like the Nova is going to get finished by my May deadline...

I've mixed feelings about this - I am disappointed to have to stop the professional build before it's finished, but I'm also excited to get back to hands on work with the car.

It's been so long since I last had opportunity (/will) to work on a car to do anything other than basic servicing that my confidence level is at an all time low to be honest :(

Expect to see a fair bit more of me asking for advice in specific areas!!

We'll see what's left on it when I take the car back, but this is the outstanding jobs list right now:

Engine
1. Oil leak – I believe this is coming from the camshaft front seals rather than the rocker cover gasket. Job will involve removing all the timing belt and housings.
2. Idle issues – May be the idle valve defective but could also be that the Lambda sensor is right at the open end of the header so not reading true.
3. Exhaust system to be purchased/fabricated.

Cooling System
4. Radiator has not been secured as the A/C condenser does not fit our rad. A condenser will need to be fitted in front of the rad.
5. Header tank is here but not fitted yet. It does not have a hot water return on it so we need to buy a fitting.
6. Heater pipes have not been run the length of the car yet. These will need to run down the nearside before the side pods are fitted.

Dash Wiring
7. Almost complete. Just needs a couple of wires for the interior lights switch.
8. Speedo will need calibration.

Body Wiring
9. Main loom needs lacing down the side and a tidy around the fusebox area.
10. Loom for the rear valance has been tested and working and has a connector ready to just plug in when valance is installed.
11. Front lights are not installed or wired.
12. Wiring from dash connectors to screen wash not installed.

Brakes
13. New hoses are needed for the connection between reservoir and master cylinder. Exiting pipes are permeating brake fluid so are not the correct grade.
14. Bleed brakes.

Steering
15. Steering column not finally installed yet. (Whilst dash lower section is still out).
16. No final steering wheel arrangement.

A/C
17. A/C condenser from CBS does not fit our rad. so a replacement needs to be sourced.
18. Compressor does not have screw fixings so adaptors will need to be designed and manufactured to suit.
19. We have the fittings but the hoses have not yet been made up.

Bodywork
20. Rear valance – upper and lower not yet fitted but is fully wired to a connector.
21. Side pods not yet fitted.
22. Repair damaged and aged areas of the gel coat / GRP
23. Final exterior coating (wrap/plasti-dip/paint)
24. All interior trim and seating.

Roof
25. Pump wiring including the relays are done but just need the remote module connecting when it arrives.
26. Hinges & struts not fitted yet.
27. Hydraulic pipes not fitted yet.
28. New pipe and fittings required to connect restriction valve to the pump.
29. Connectors require fitting to both ends of the wiper wiring. When I get to inspect these it may be that the wires also need to be replaced.
30. No screen wash system fitted yet.

I'll need to prioritise these into MOT urgent things, and everything else, and then again into things I can do myself (albeit with help perhaps) and things that cannot be done without a workshop.


__________________


Veteran Member

Status: Offline
Posts: 44
Date:
Permalink  
 

It lives, again!


The far right red light is indicating the there are (somewhat unsurprisingly) fault codes on the ECU.
Some problem with the oil pressure gauge too unfortunately, only know it's the gauge because they fitted the same set to another car and the same thing happens!
That's only a temporary exhaust to give a bit of back pressure, but it shows that we'll be able to get away with a small silencer, which is good as that's all there will be space for lol


-- Edited by PaddyX21 on Wednesday 7th of December 2016 12:56:25 PM

__________________


Veteran Member

Status: Offline
Posts: 44
Date:
Permalink  
 

Words courtesy of Southways again:


Nova update time! A panel is made for the battery to sit on. You don't really need a big panel though, a frame would have done. Why have we done that, I wonder?


Ahhh....so we can relays for the cooling fans and what-not underneath!


As with the Imp, we're fitting a pretty coolant header tank.


And there it be, mounted to the engine on a bracket we made. We have no plans to mass-manufacturer those, before anyone asks. You know you want one!


Tank accessible from up top, filled with Evans Powercool 180. SEVENTEEN litres of the stuff!


With the coolant in, we've got a chance of getting some warm air through that lot.....once the dash is back in, obviously!


The original port used to drag hot air from the exhaust into the footwells. We've capped that off and plumbed in the feed from the new heater bower motor unit.


The dash is now live, all switches and dials all hooked up. Couple of glitches so far, such a a speedo that floats up and down with the engine revs, if the wheel is in a certain position! The speedo starts working normally as soon as it's rotated though.


With the dash back in, we're able to install the heater and bleed it all in. Here you can see the heater hoses, and some of the hydraulic lines for the roof system.


Here's a batter destined for a certain green TVR powering up the Nova. The roof pump is visible underneath, and the radiator is now full of coolant! It doesn't flow as well as we were hoping at the moment, so we need to figure out if that's because an element of our design isn't right, or if the standard Subaru water pump isn't up to the job.


And speaking of roof hydraulics, here are the roof struts. Bolted in, and working.


We'll try to get a video of this in action soon


We'll also get one of it running, as we've fitted the exhaust we'd rigged up for the Imp's testing. It sounds bloody awful!


__________________


Veteran Member

Status: Offline
Posts: 44
Date:
Permalink  
 

Little bit of update:


And something I found through the wonders of Facebook, and have now purchased without knowing for certain if it'll fit  :roll: 


And how it looked when fitted to a Subaru EJ converted VW Bus thing:


It consists of RJES cast manifolds (no longer made, the tooling wore out and he doesn't intend to replace) Frankensteined to a Porker Boxster system. Looks like it'll do the job to me! 


And the last couple of pic's sent to me - finally looking like a car again!


I'm going to visit to take the exhaust and some steering components down on Wednesday, and I've been teased with the possibility of driving it around the yard, so at a minimum more pics to follow, hopefully video too :)


__________________


Veteran Member

Status: Offline
Posts: 44
Date:
Permalink  


__________________


Veteran Member

Status: Offline
Posts: 44
Date:
Permalink  
 

I've stopped thinking about putting dates on it, but it really isn't a million miles off done, albeit with some post running tidying to be done!

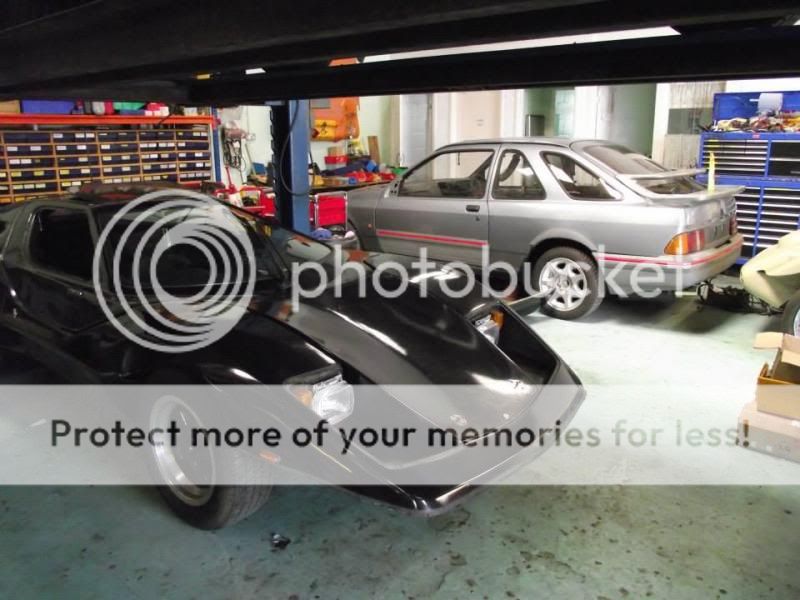
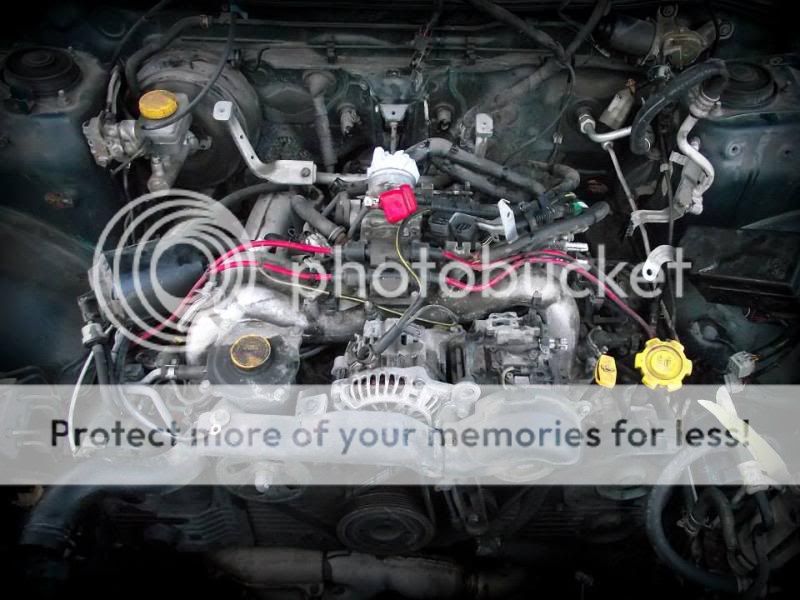
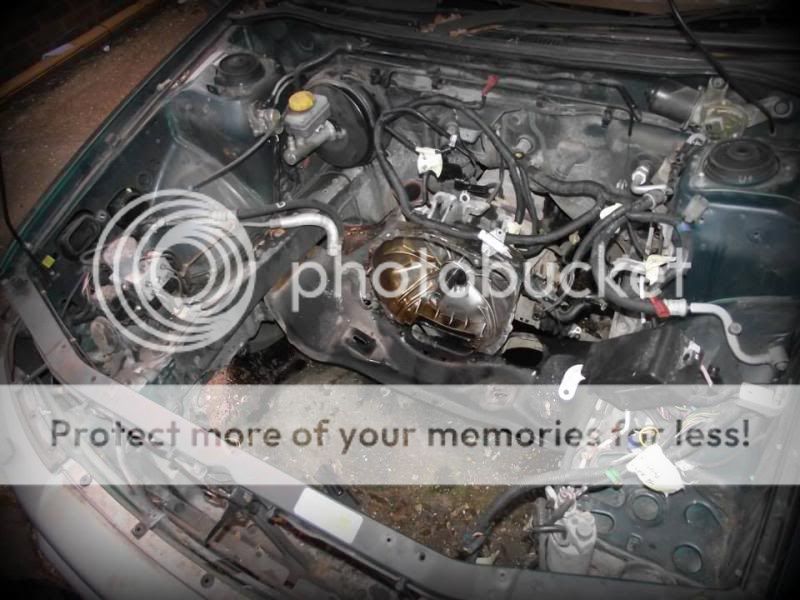
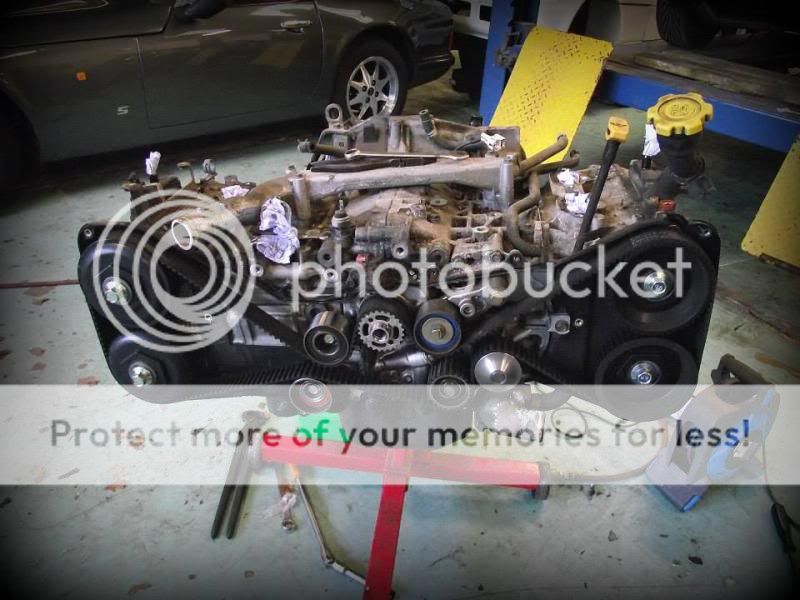
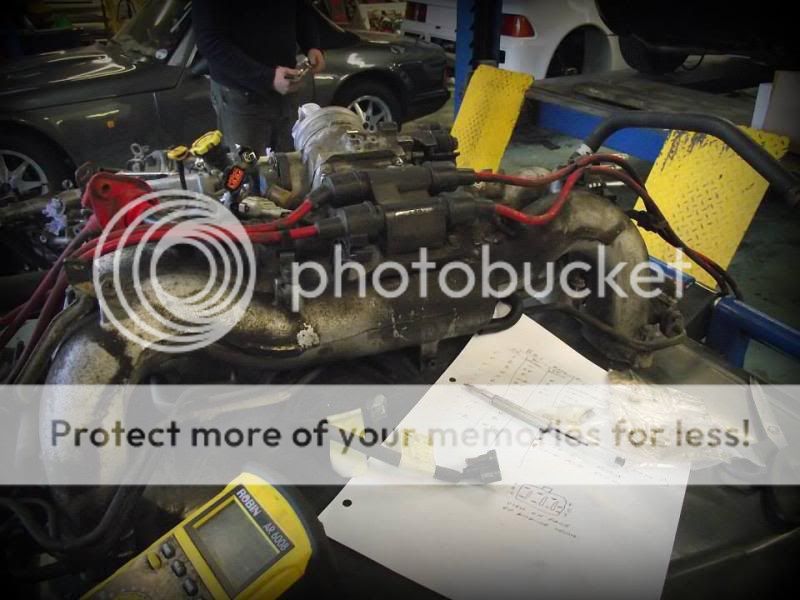
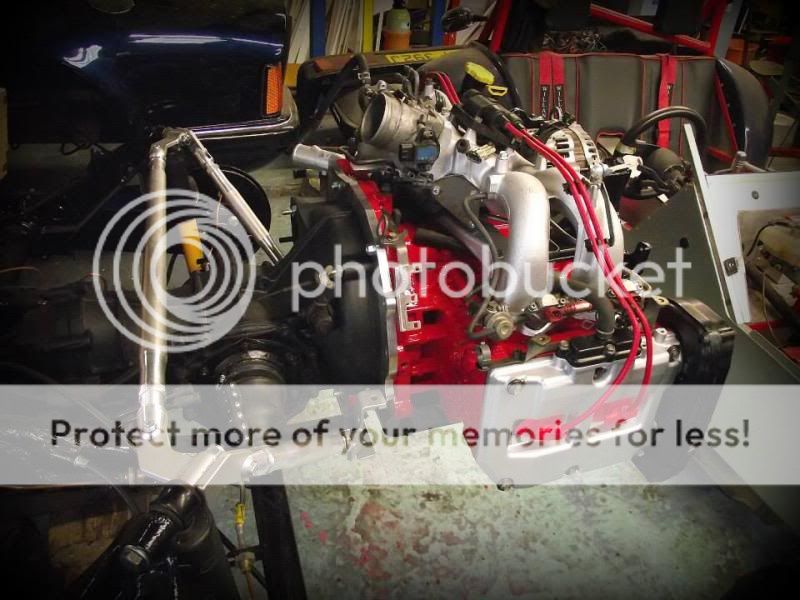
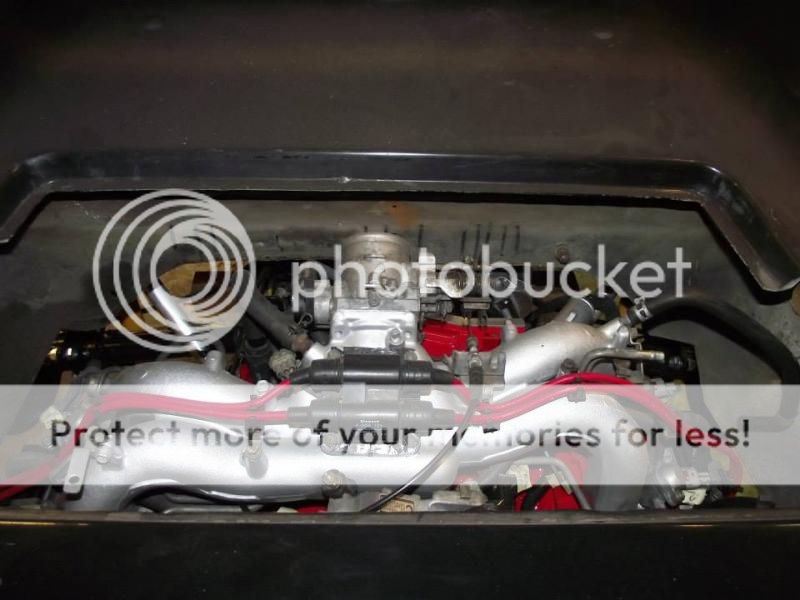
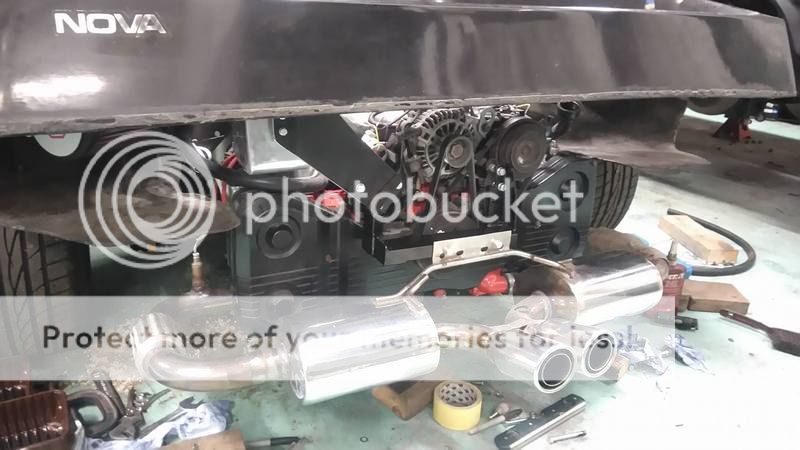
Engine is still pressurising the crankcase a bit, so PCV system needs further poking and prodding.

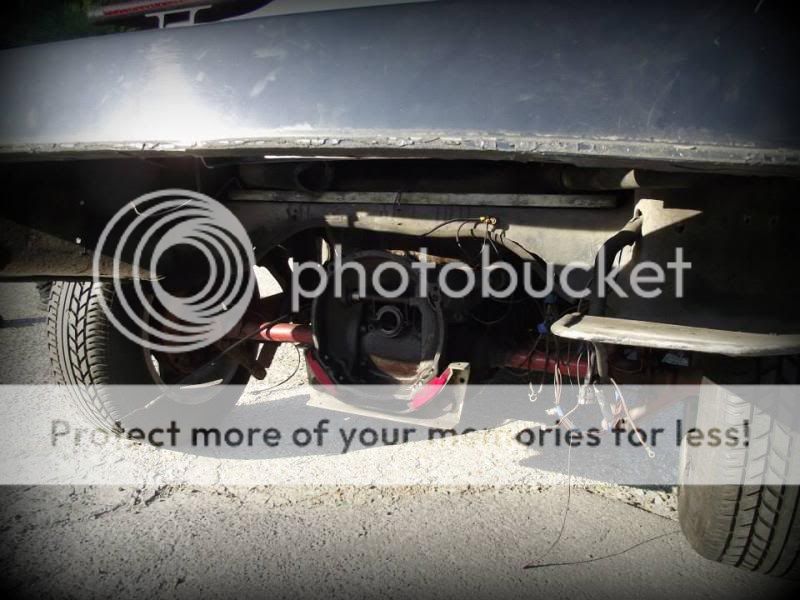
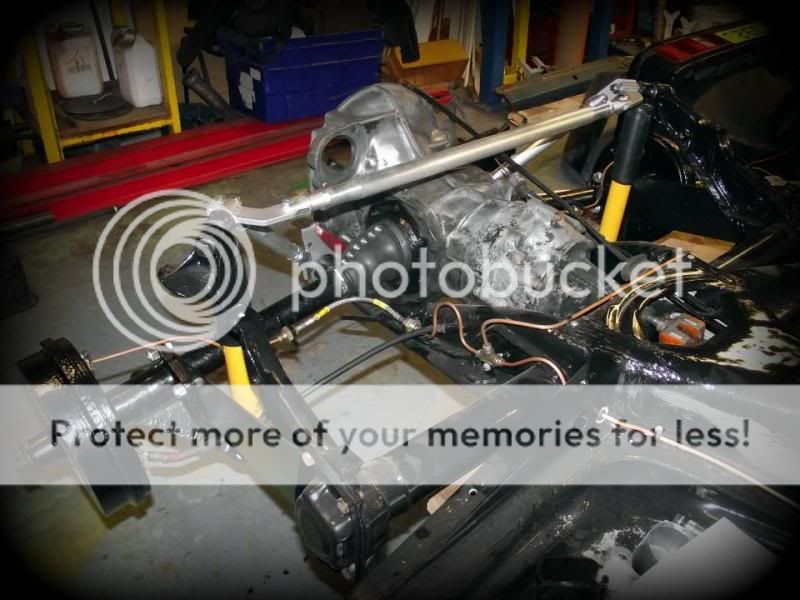
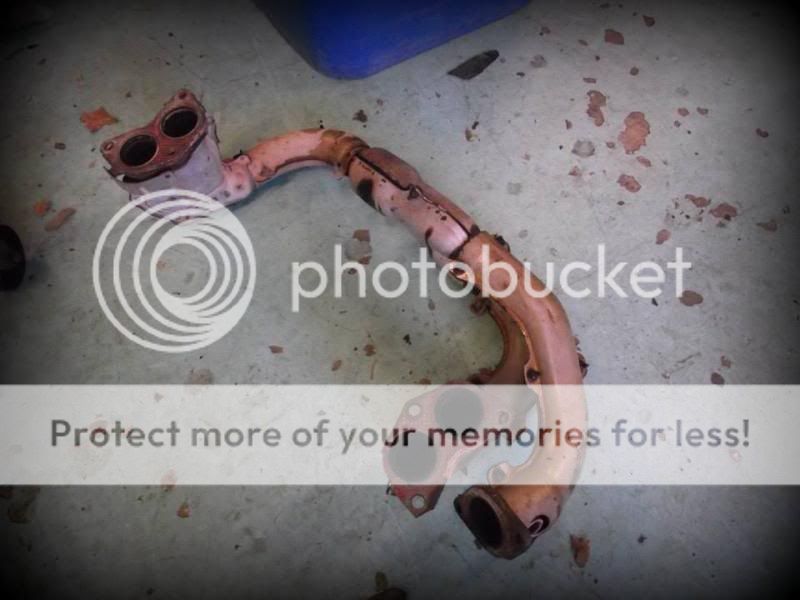
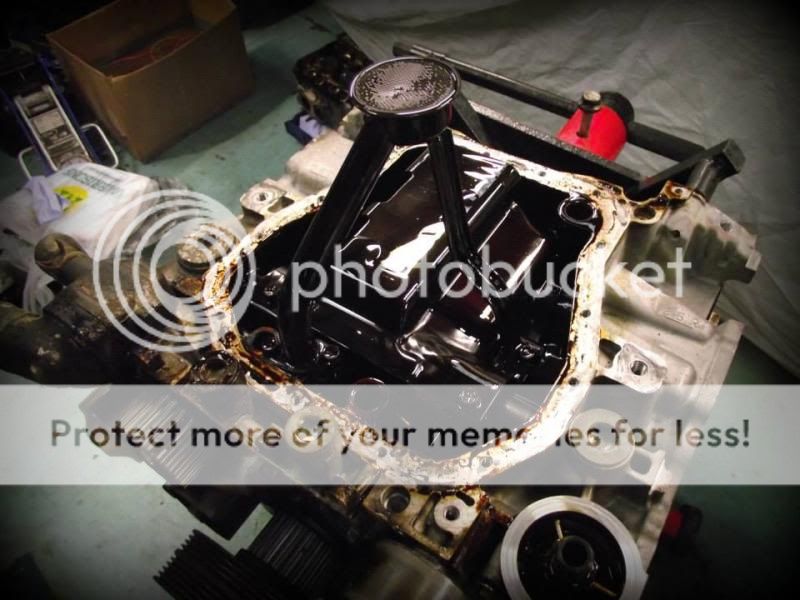
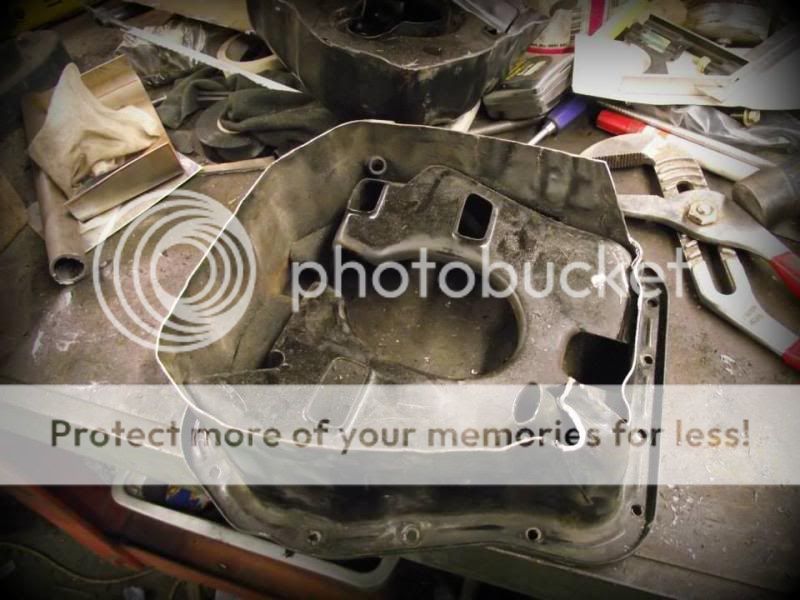
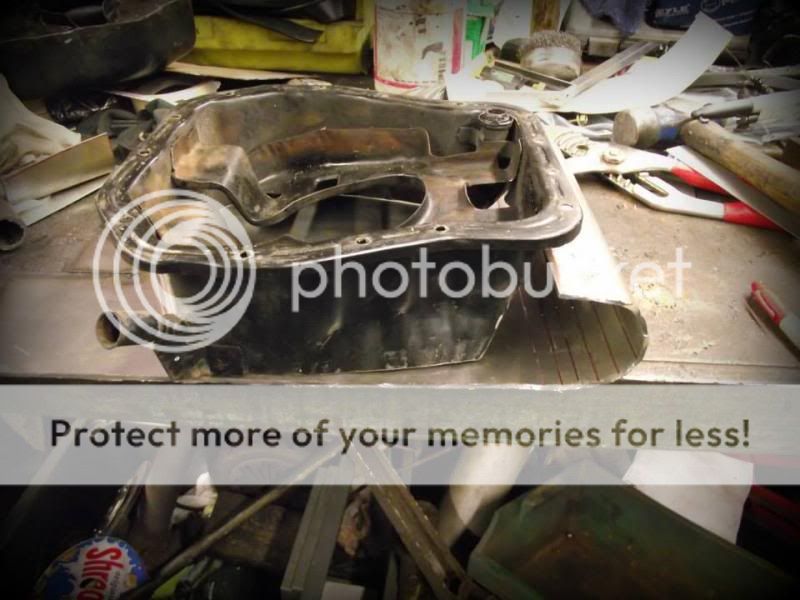
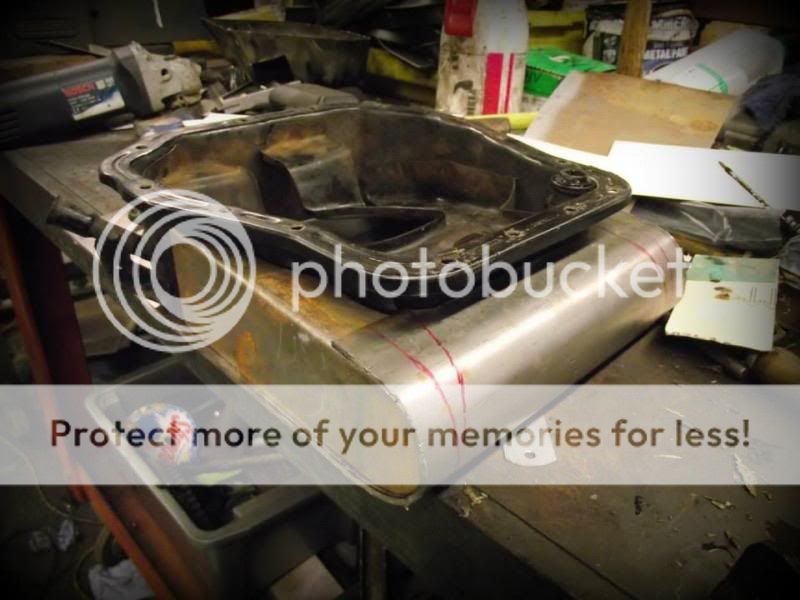
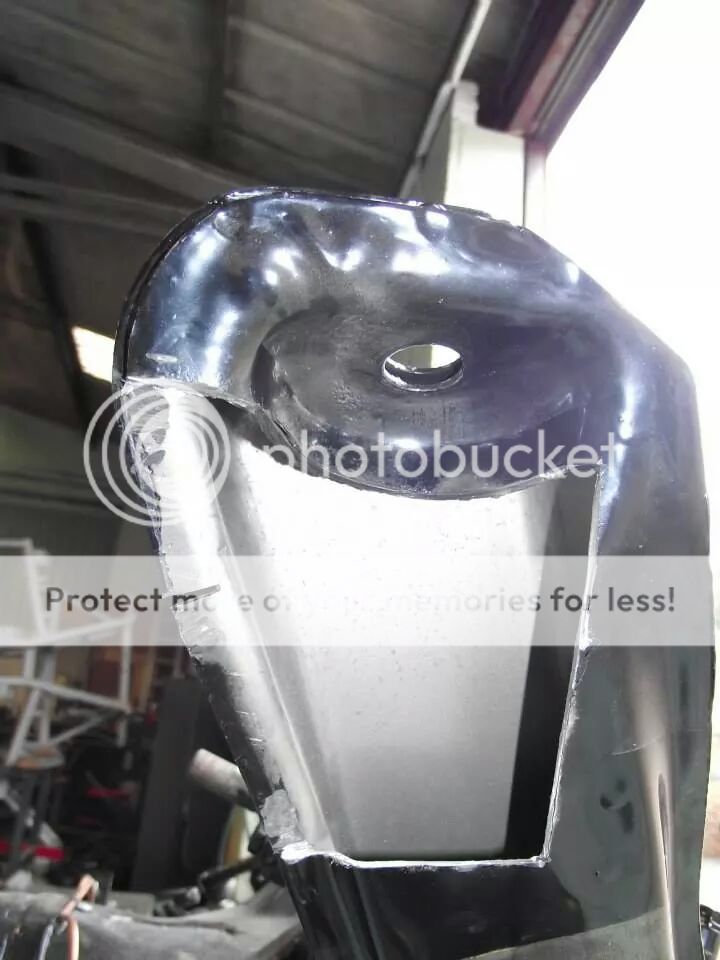
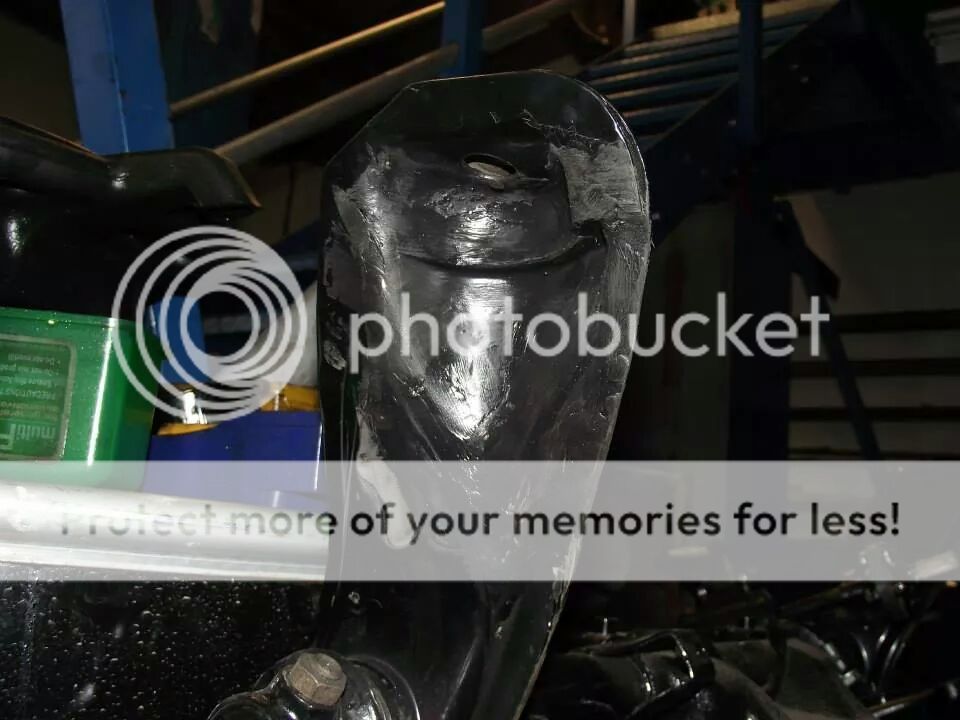
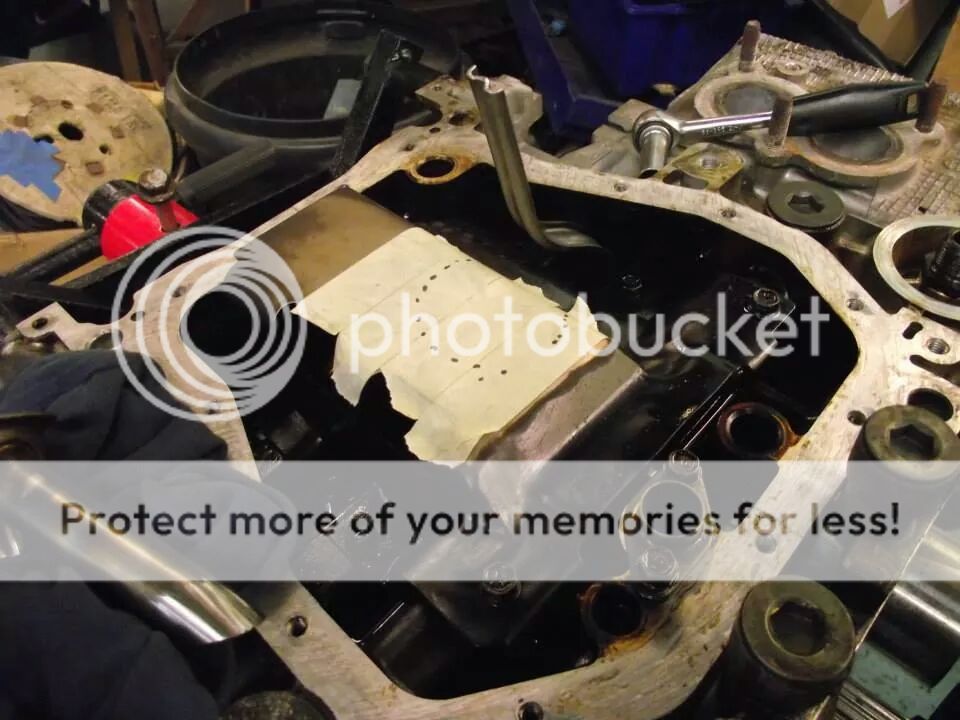
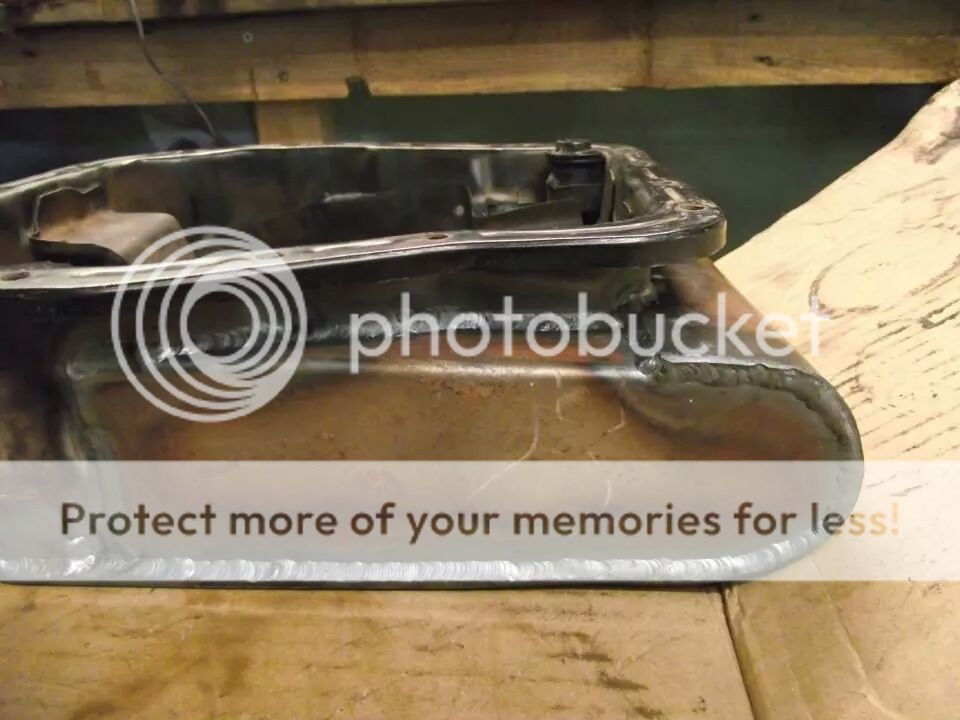
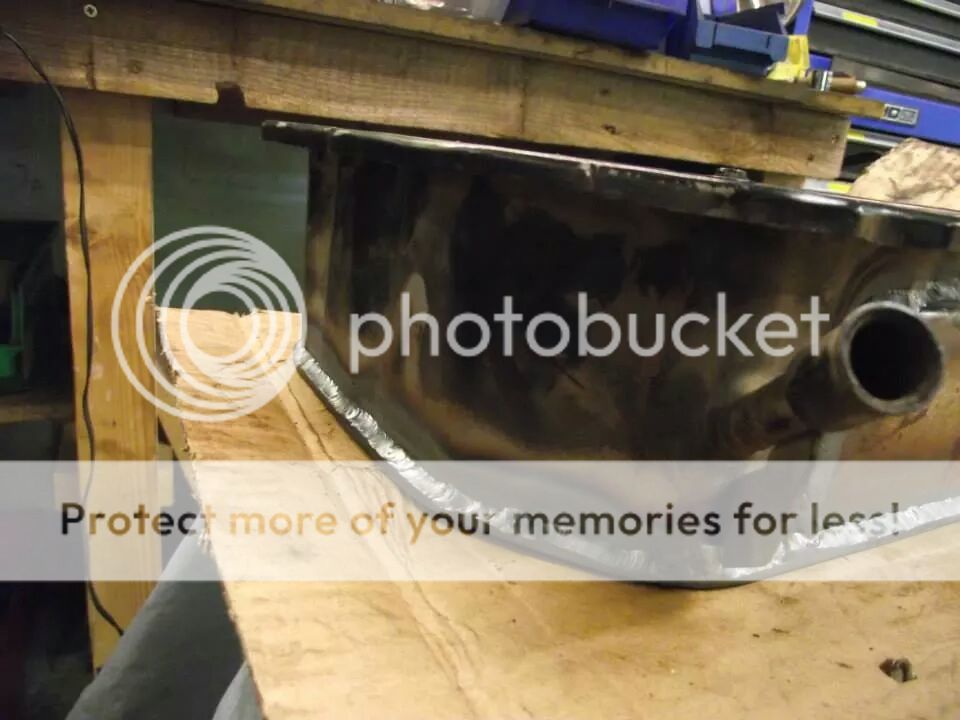
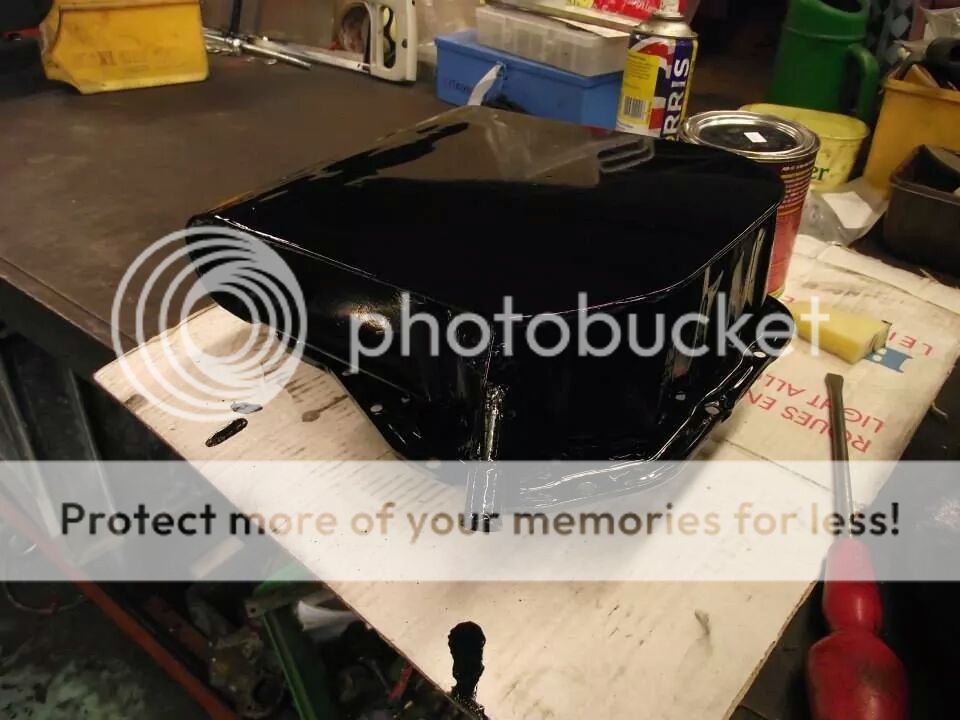
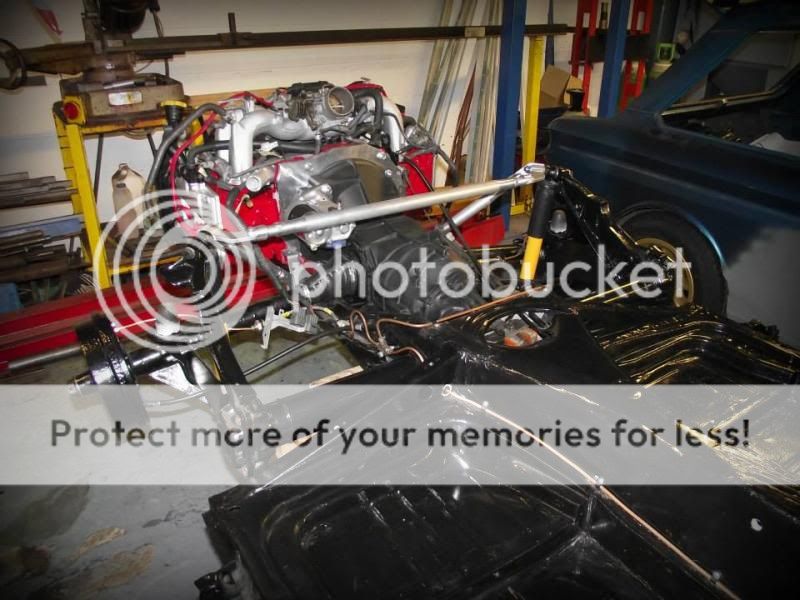
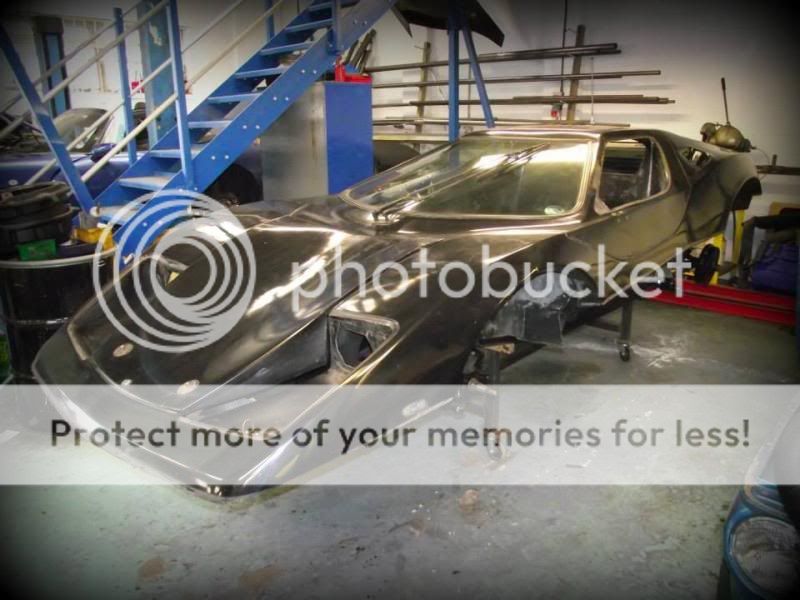
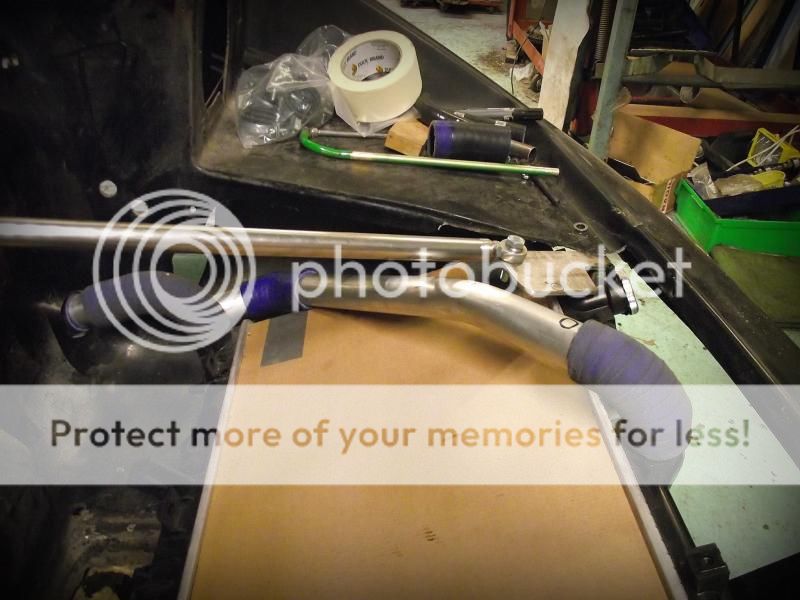
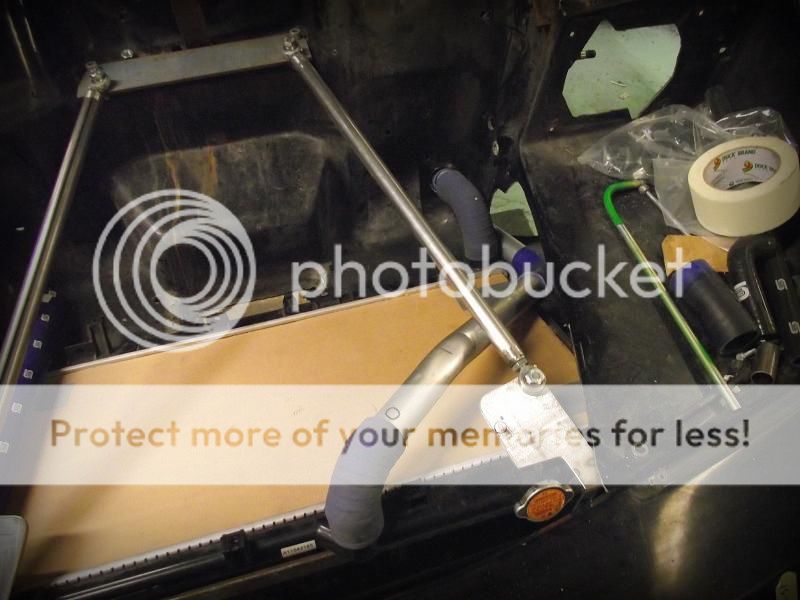
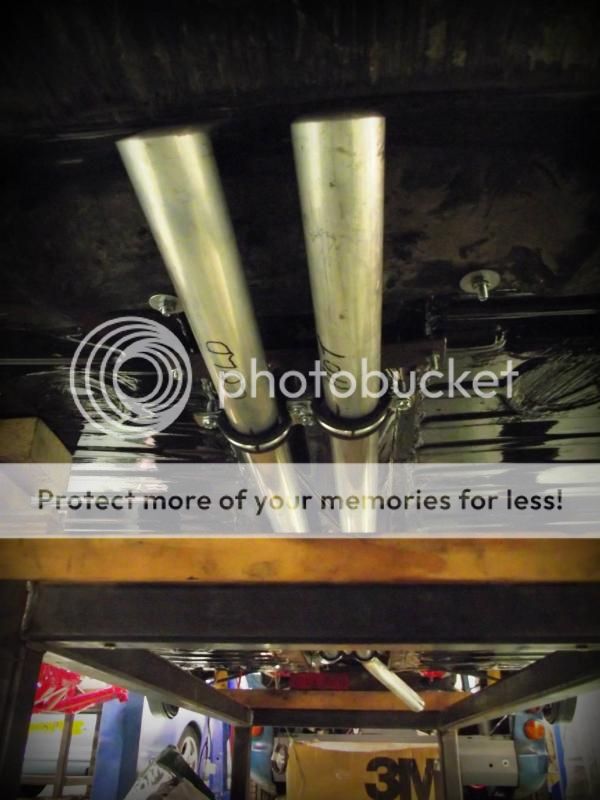
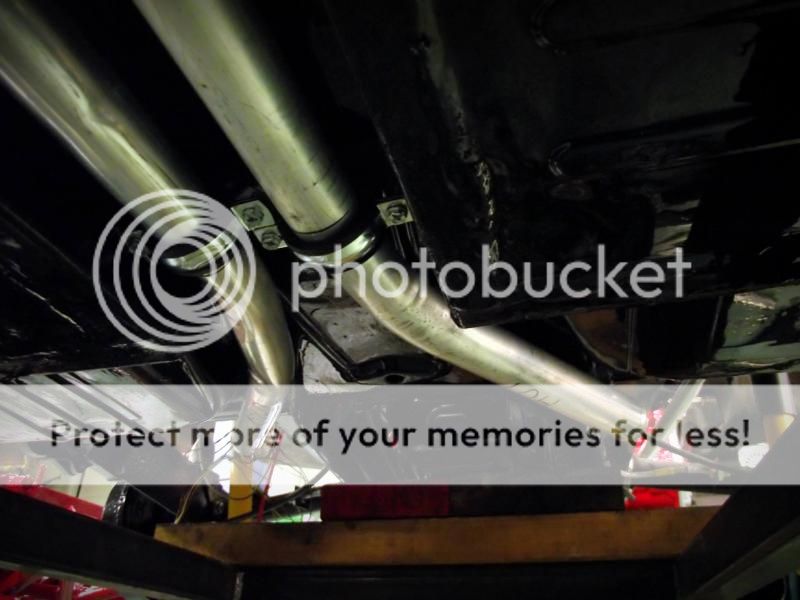
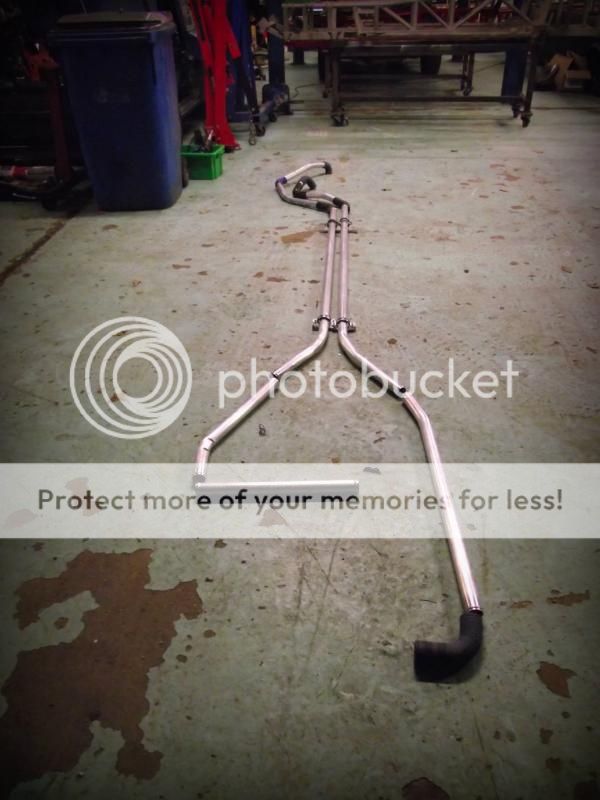
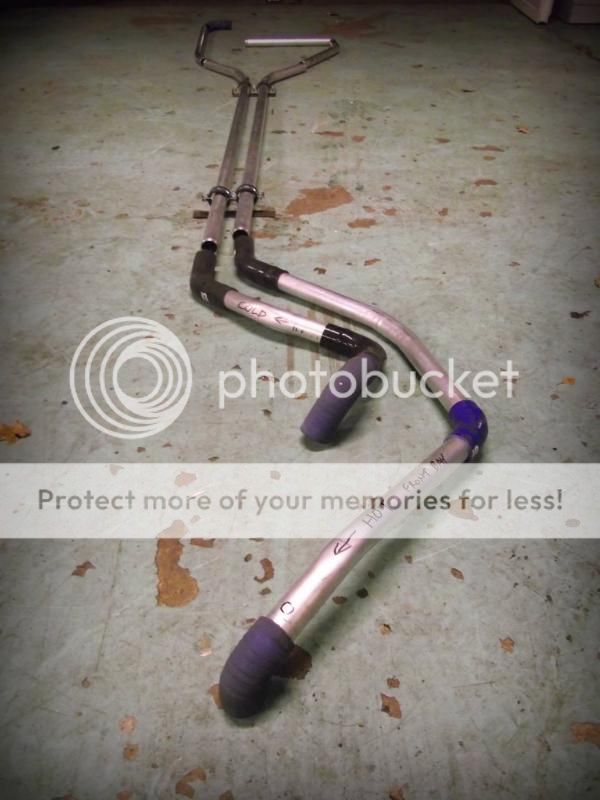
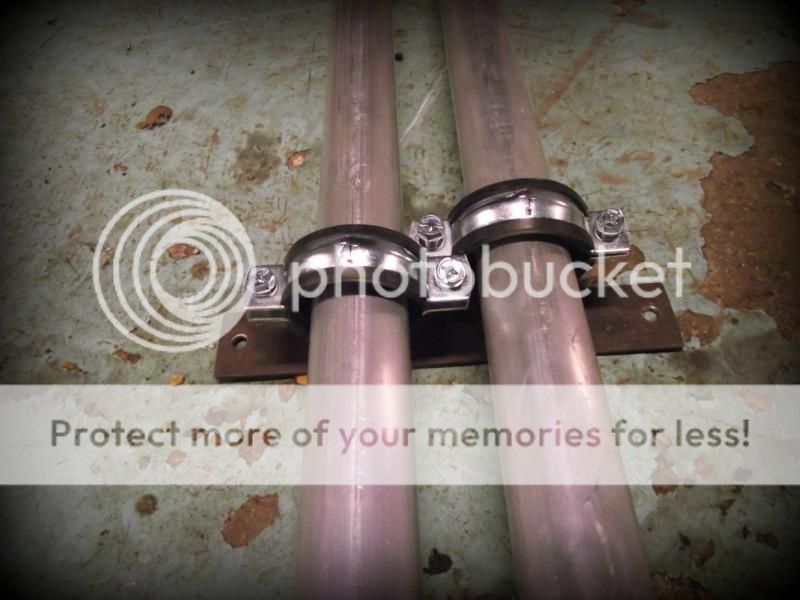
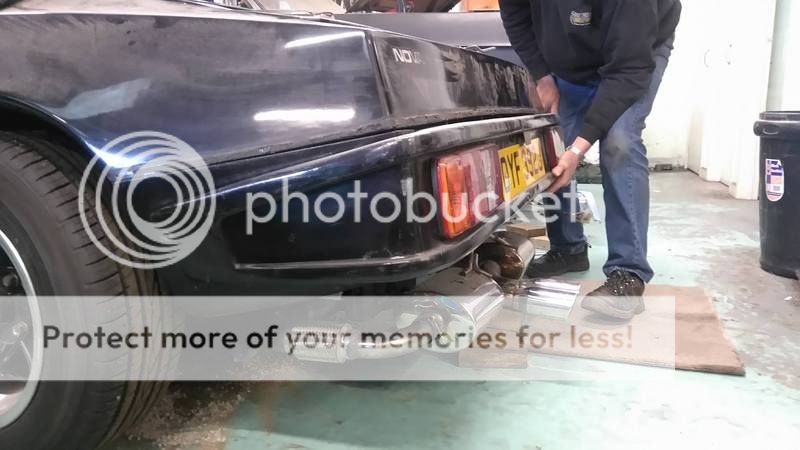
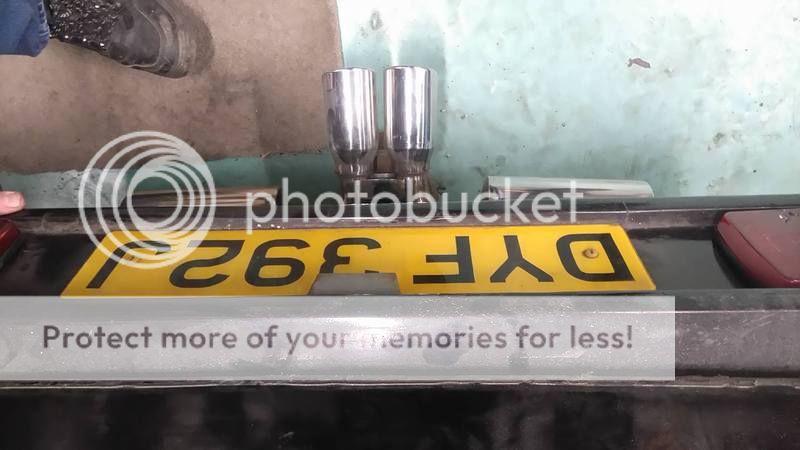
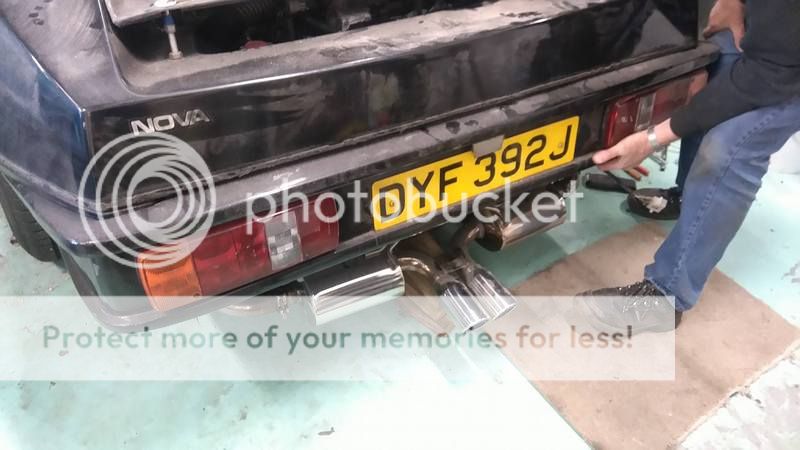
Final exhaust system is unlikely to be a straight fit - nothing ever is with this! But it'll buy an additional 2 to 3" ground clearance, which is sorely needed. If we hadn't modified the sump it'd have been touching the ground lol!

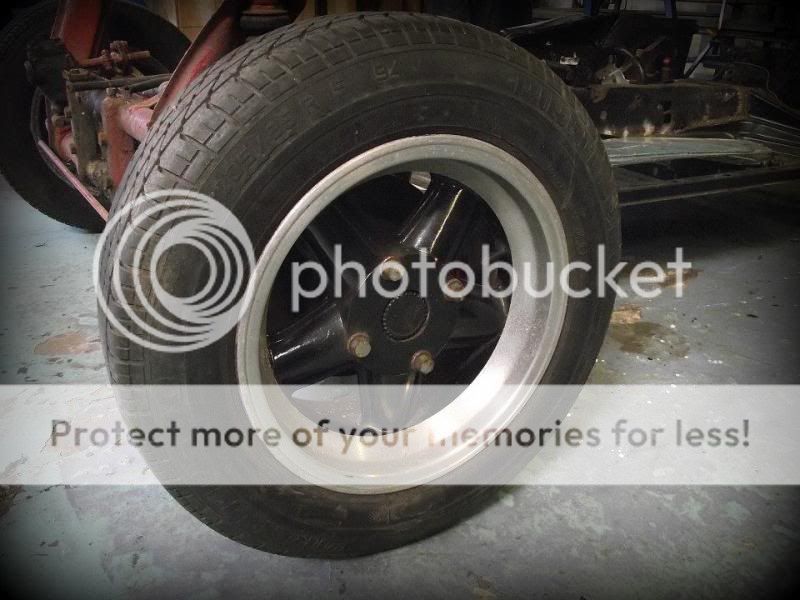
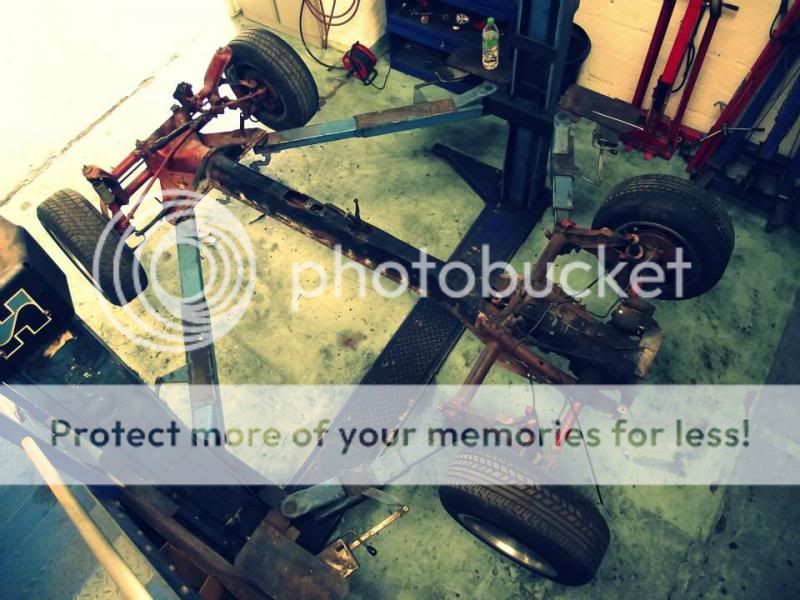
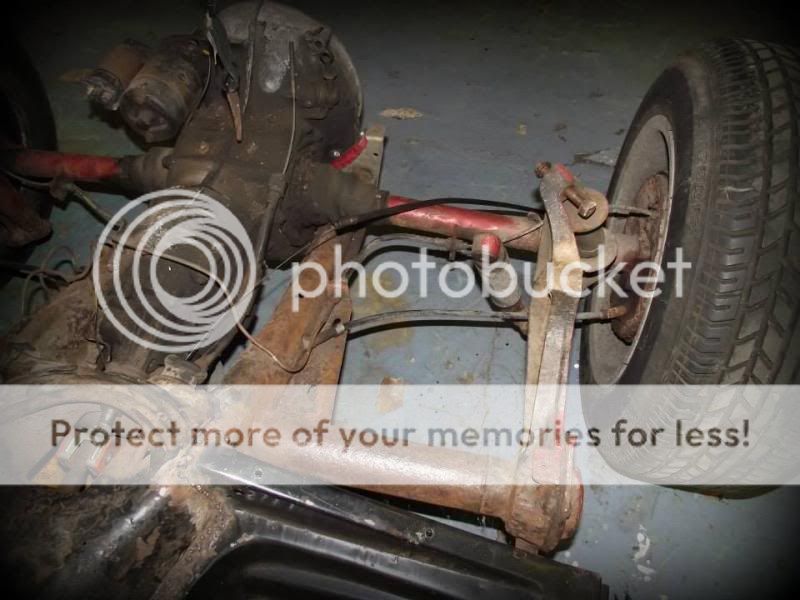
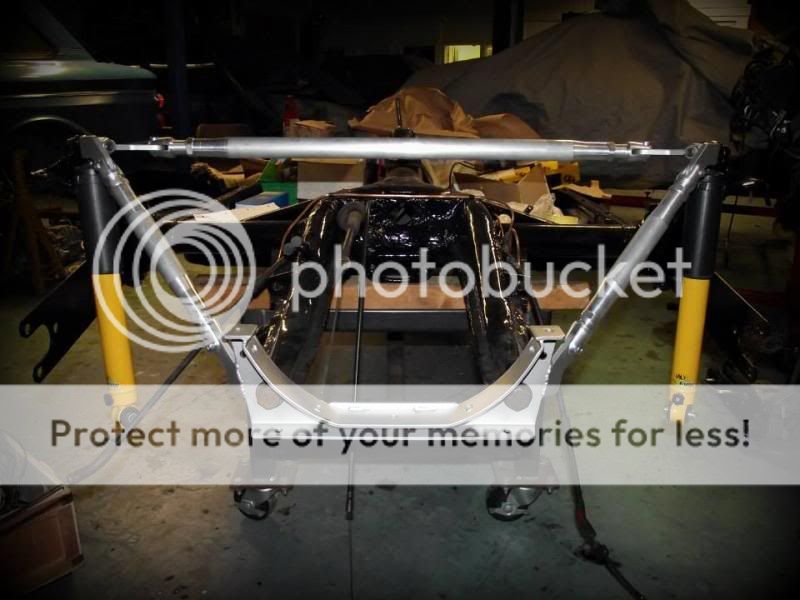
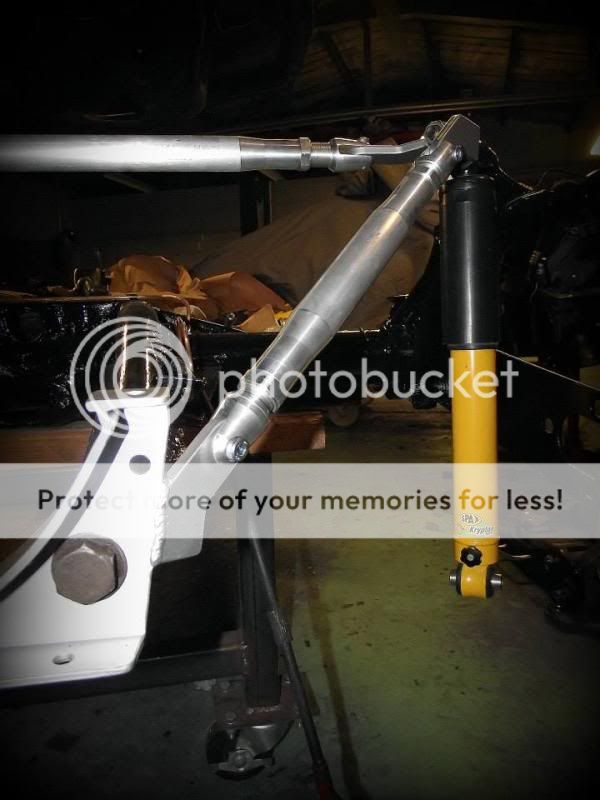
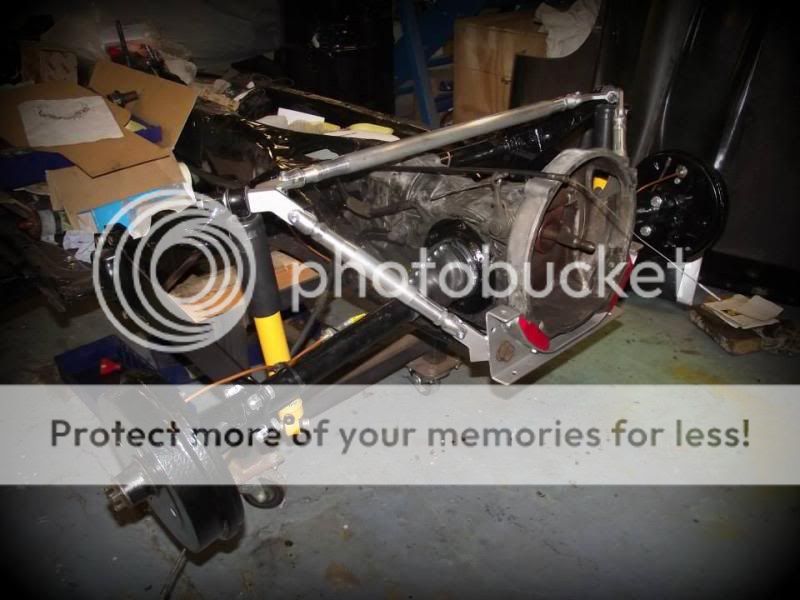
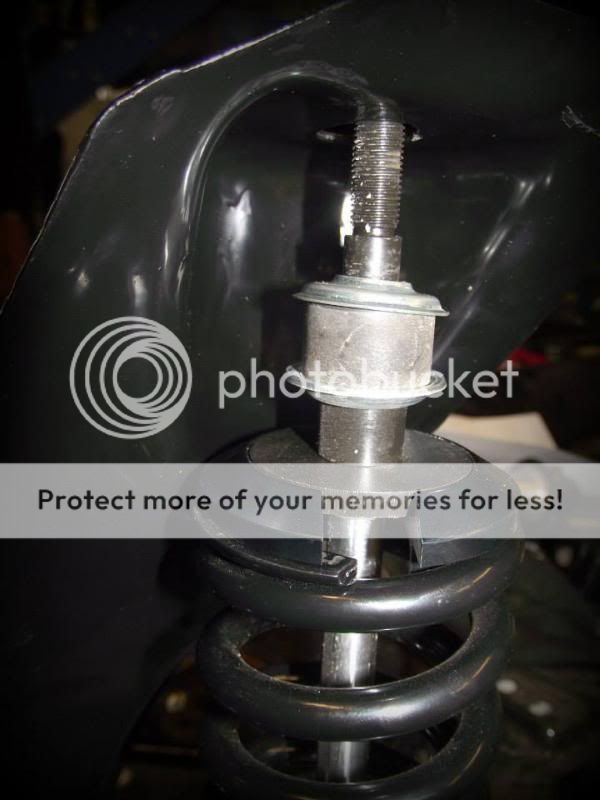
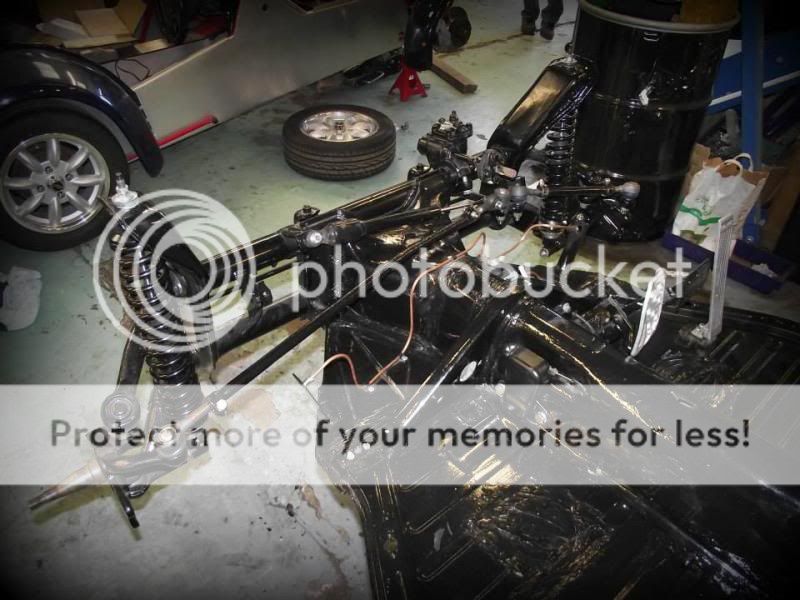
Front suspension is the Red9 Coilovers - as the car sits they are set at their very highest setting 
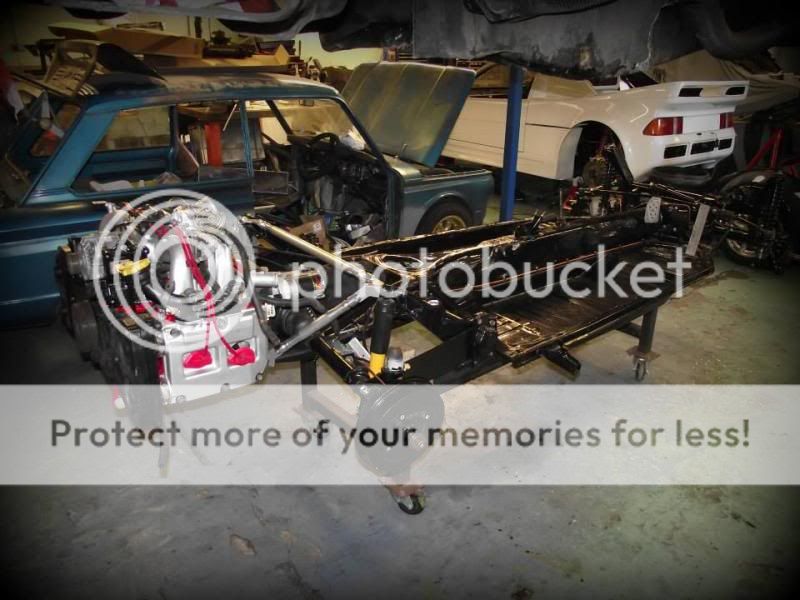
I suspect it is workable, as the long overhang gives a bit of an optical illusion making it look excessively low, but it is borderline on speed bump readiness!

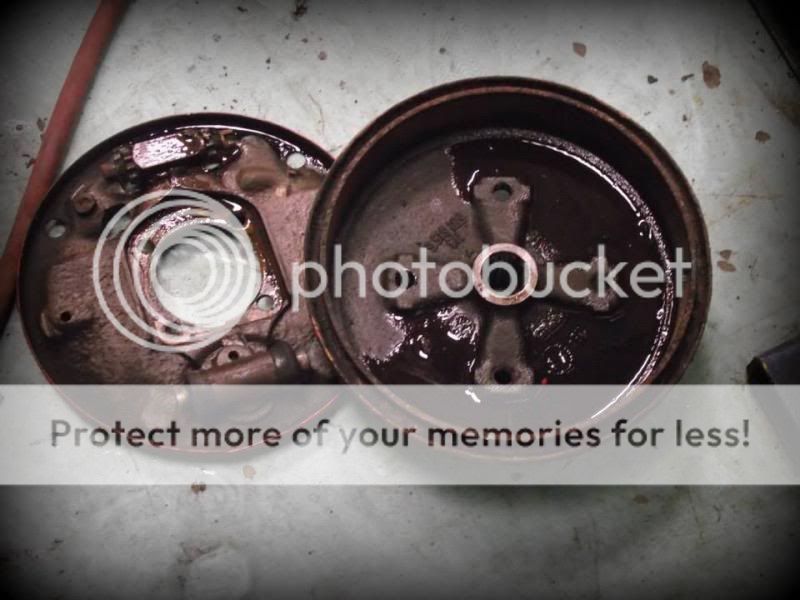
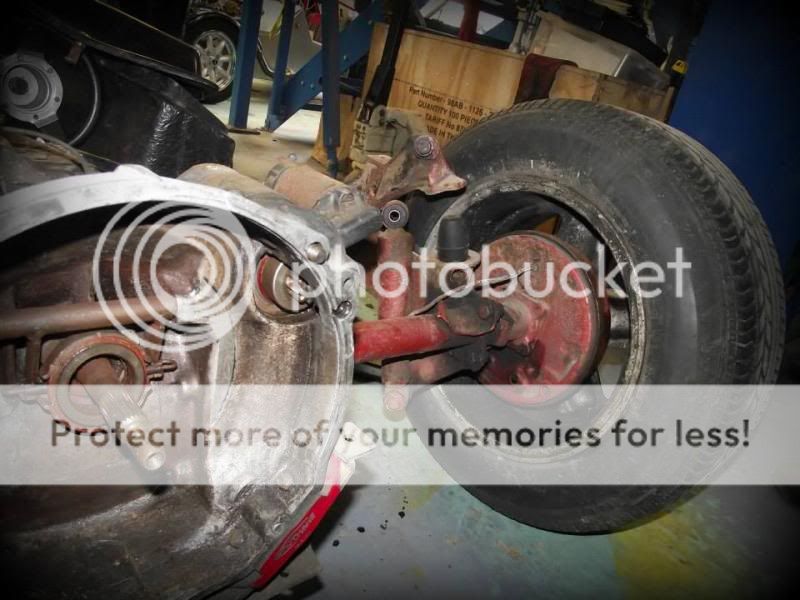
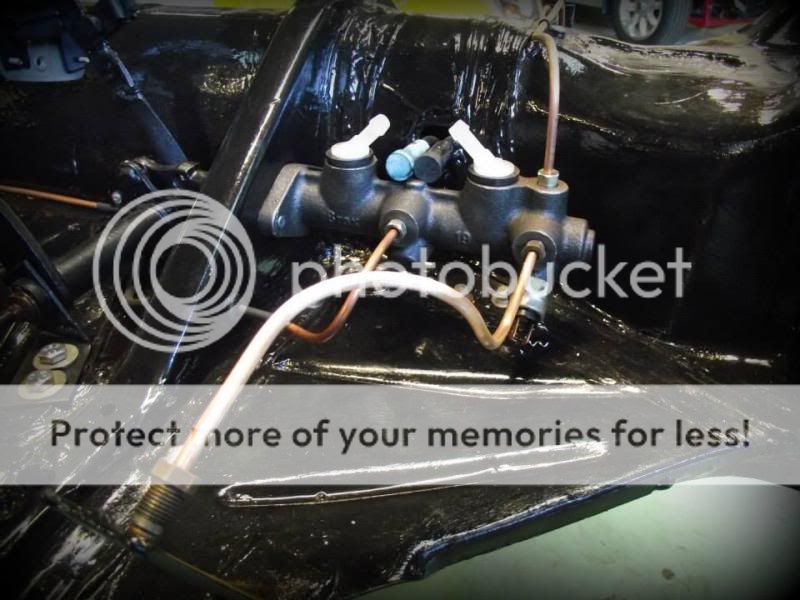
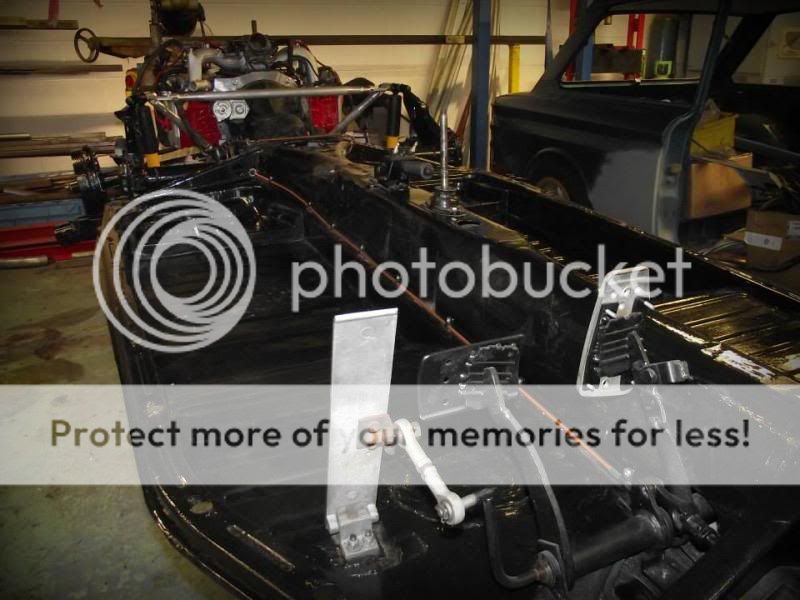
Brakes are certainly 70's spec! Whilst they work, they do require an adjustment when I've been driving 21st century tin tops for a while! I'm not tempted to change anything until I've had some road time, but it's on my 'concerns' list.

It don't half go!! Even an 1/8th throttle spins the wheels! Much fun will ensue, and I hope the gearbox can cope!

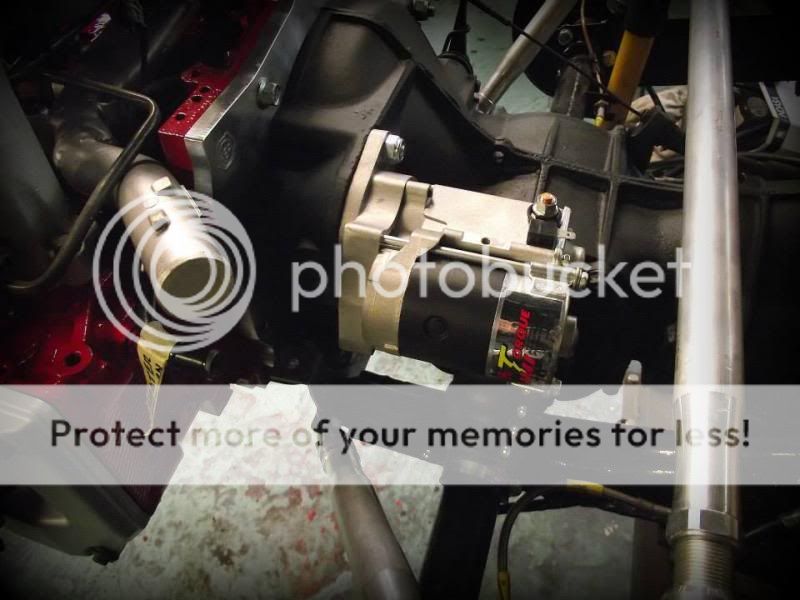
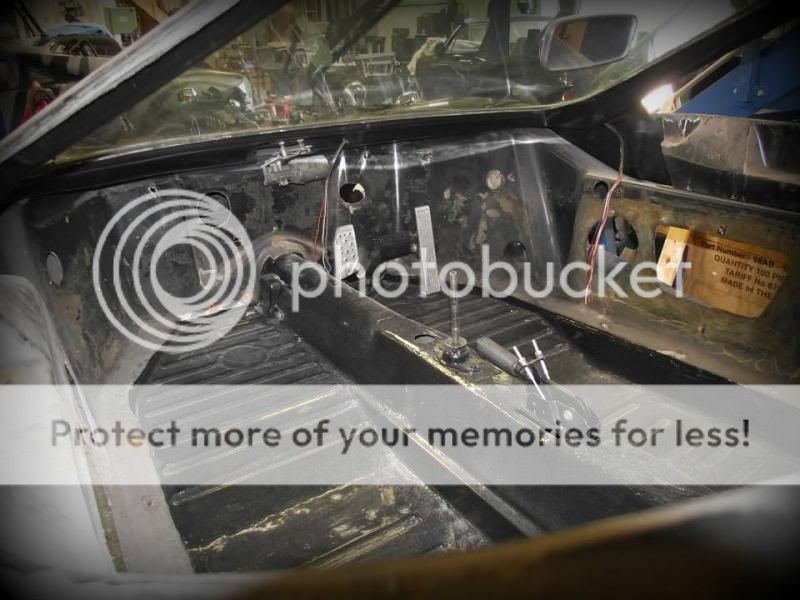
Gear selection is still sloppy, although vastly improved over the shoe lace support system lol!
I had totally forgotten what the pattern was though.

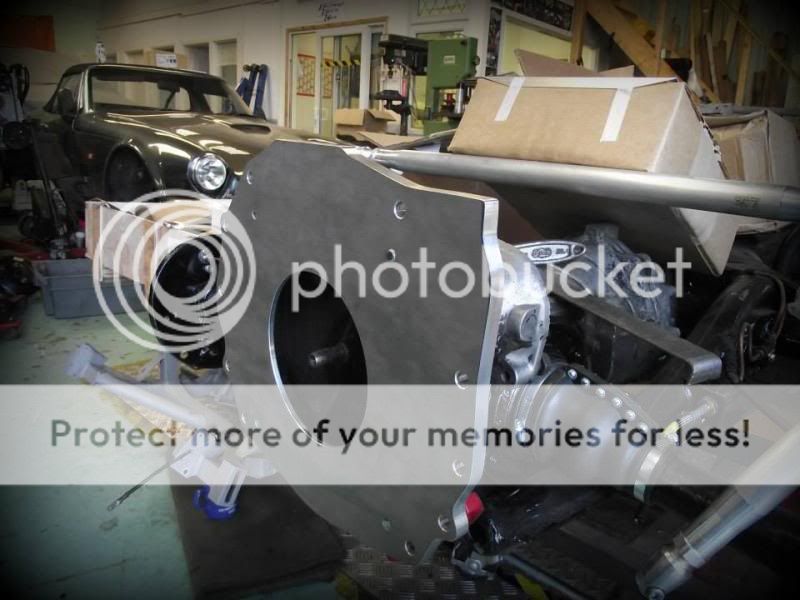
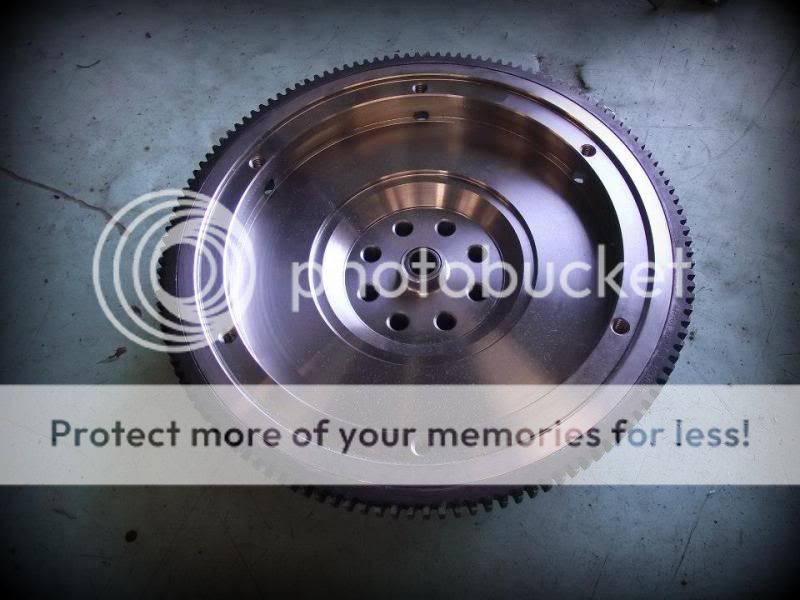
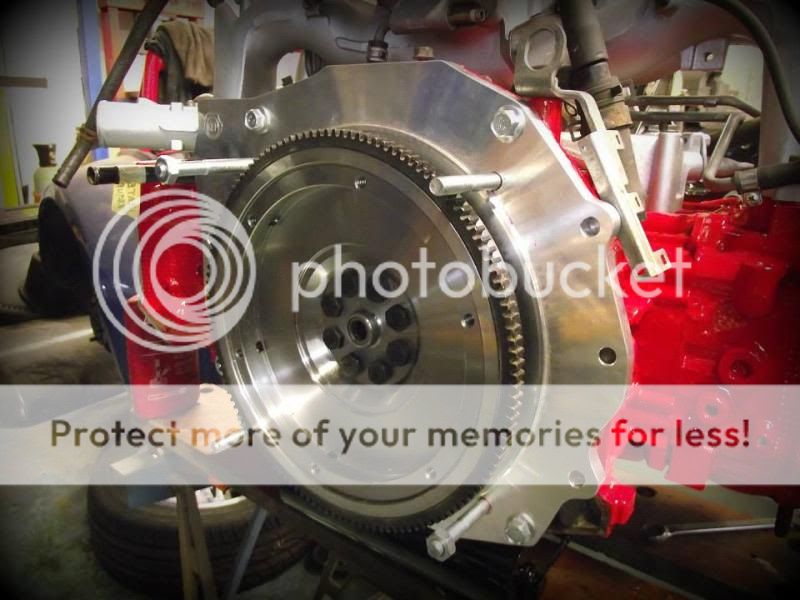
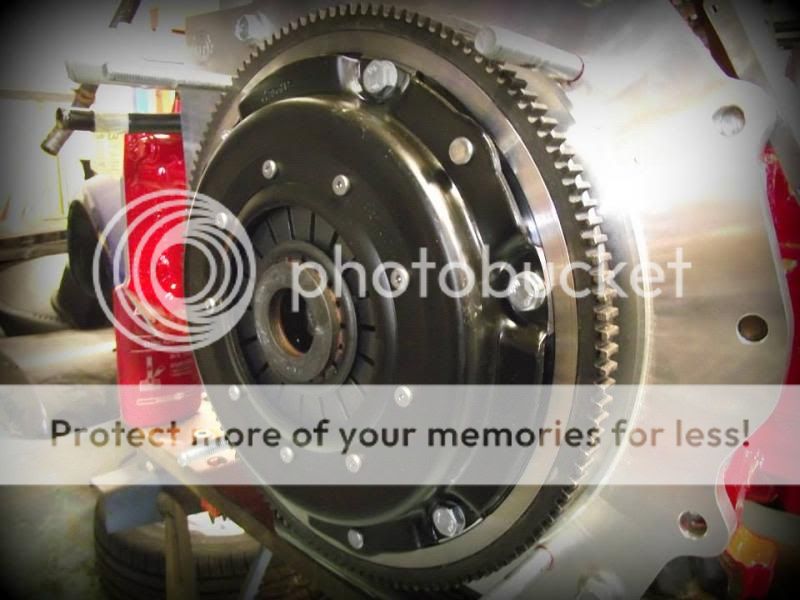
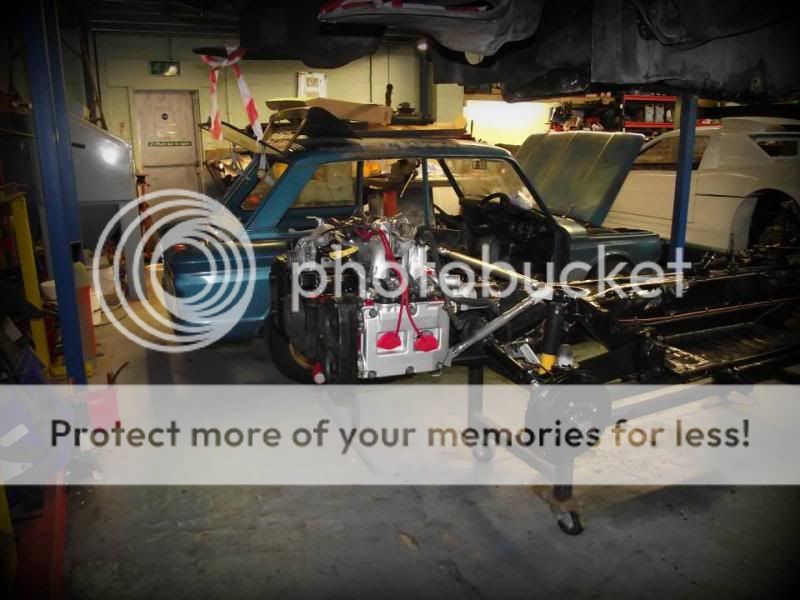
The Kennedy clutch is firm and positive, but also easily manageable, not harsh as some up-rated clutches can be.

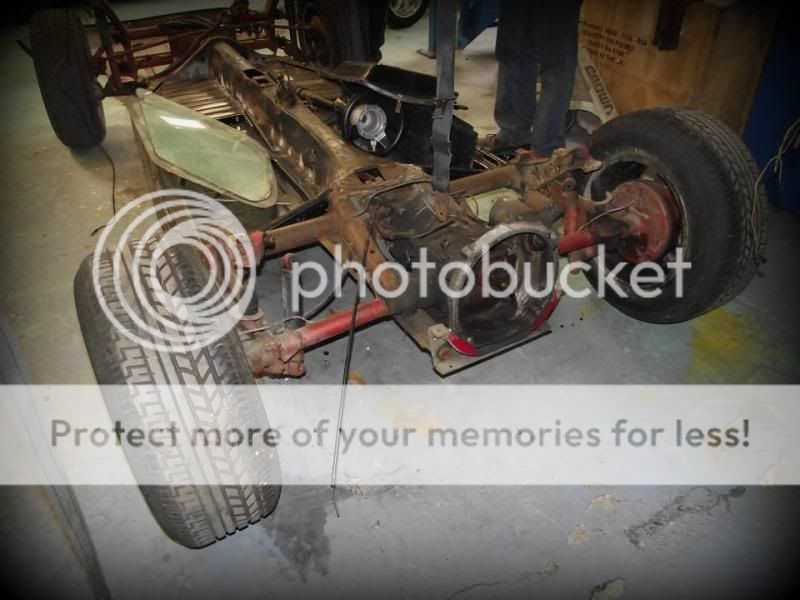
Nothing rubs even at full lock, ride is nice actually, but obviously back and forth in the yard is hardly a proper test!

Hydraulics did work - but they didn't go up evenly, and seemed to 'relax back' not clamp shut. However I will see how they perform once there is a load on there to give the system something to actually do. It did go up smoothly before, I don't remember it being jerky or see-sawing up. Area of concern, but we will cross that bridge when we get there!

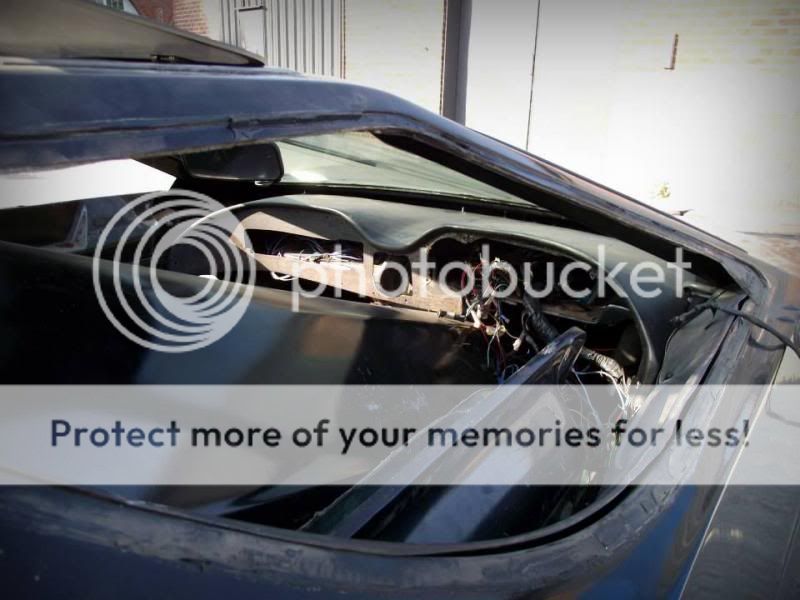
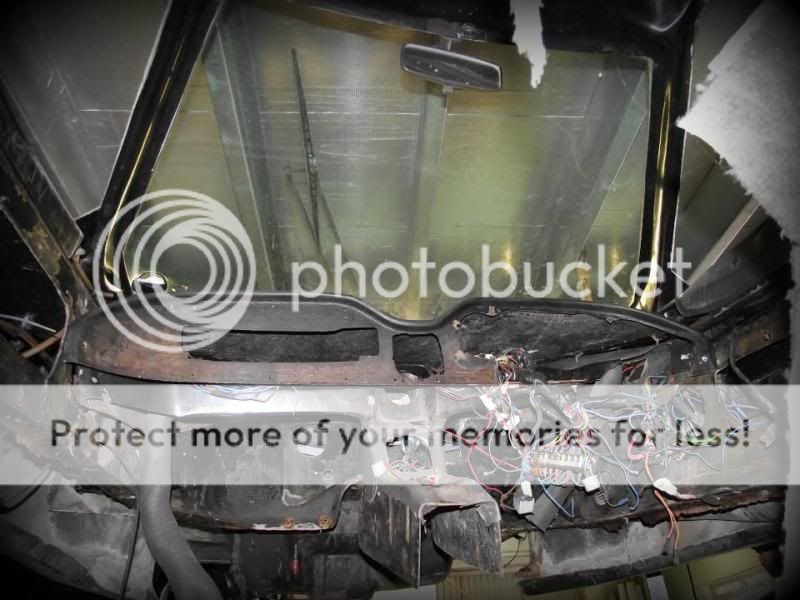
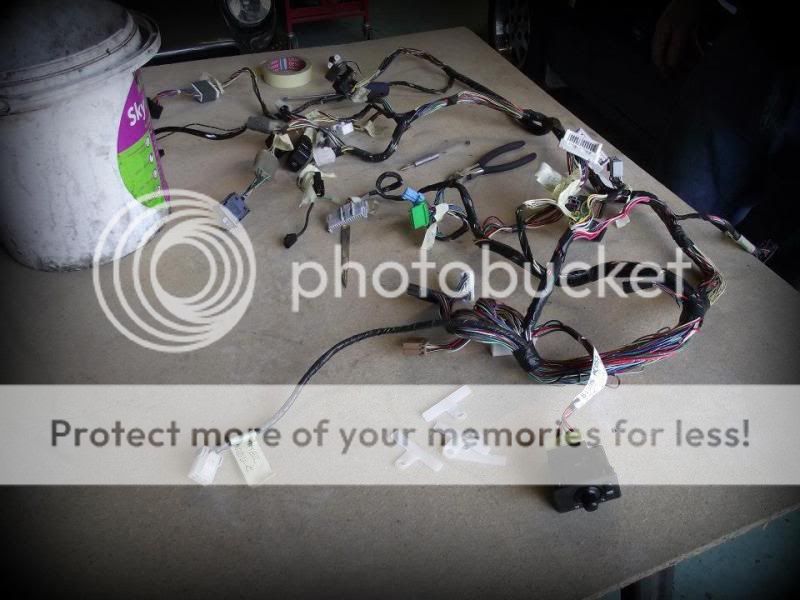
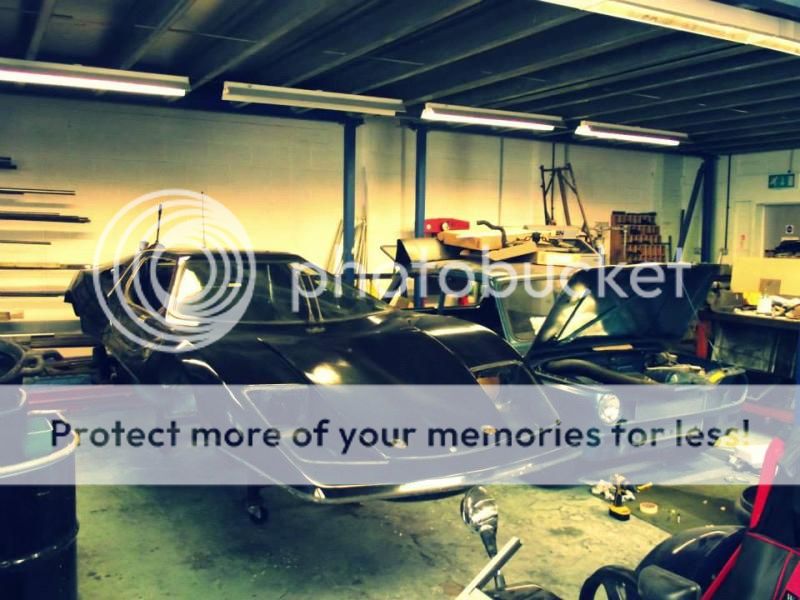
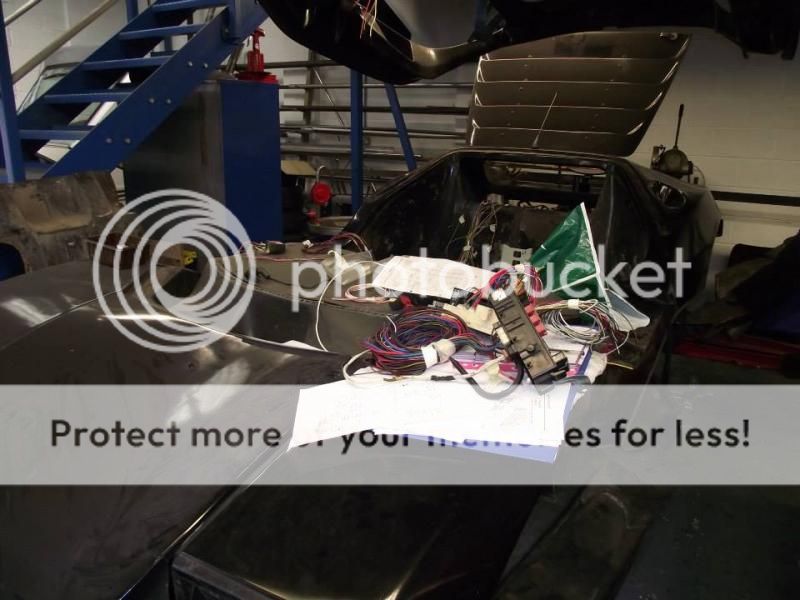
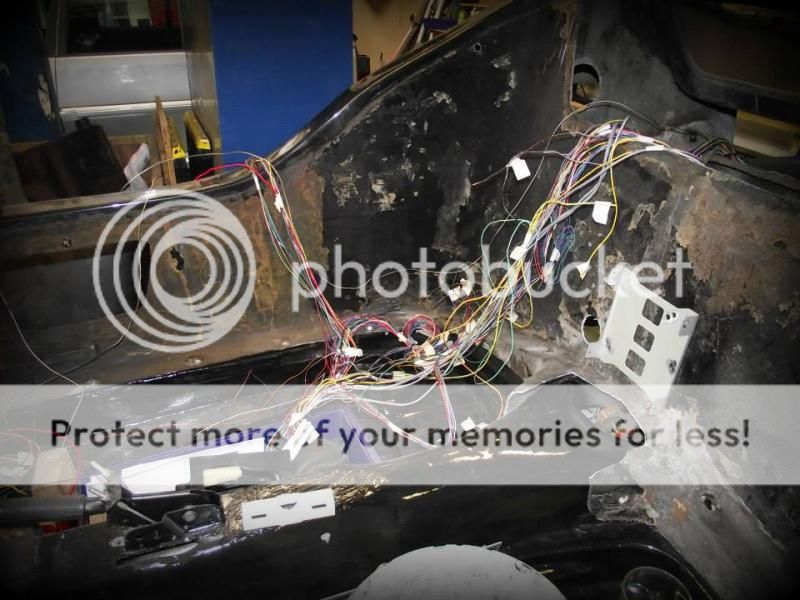
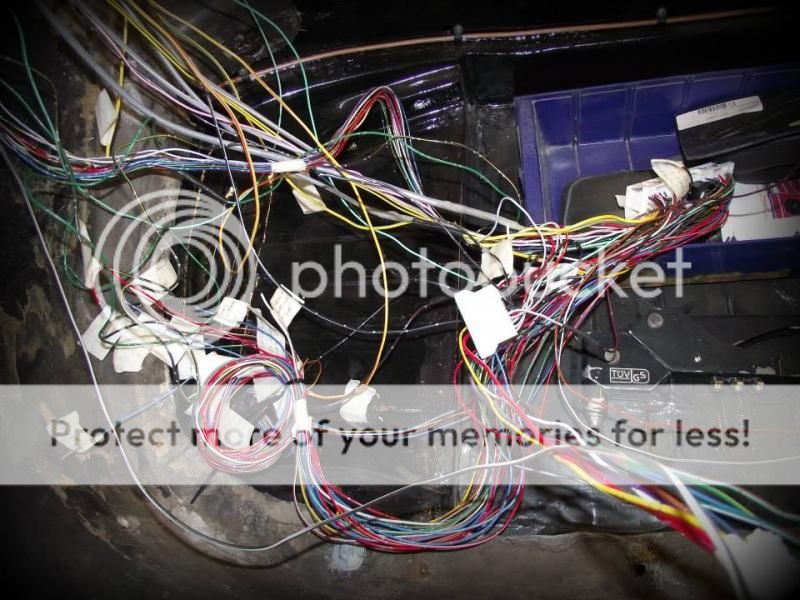
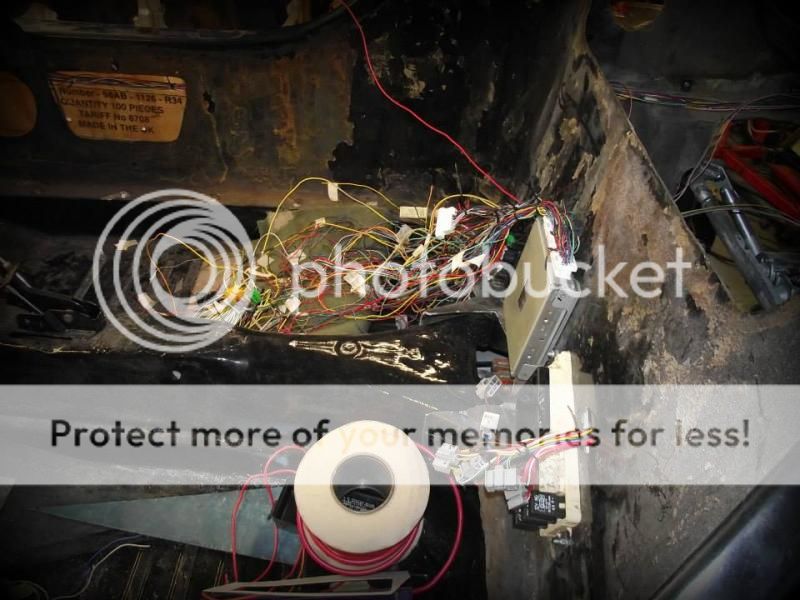
Once roof is on then the final bits of electrical can be finished up (wipers etc) and mirrors fitted.

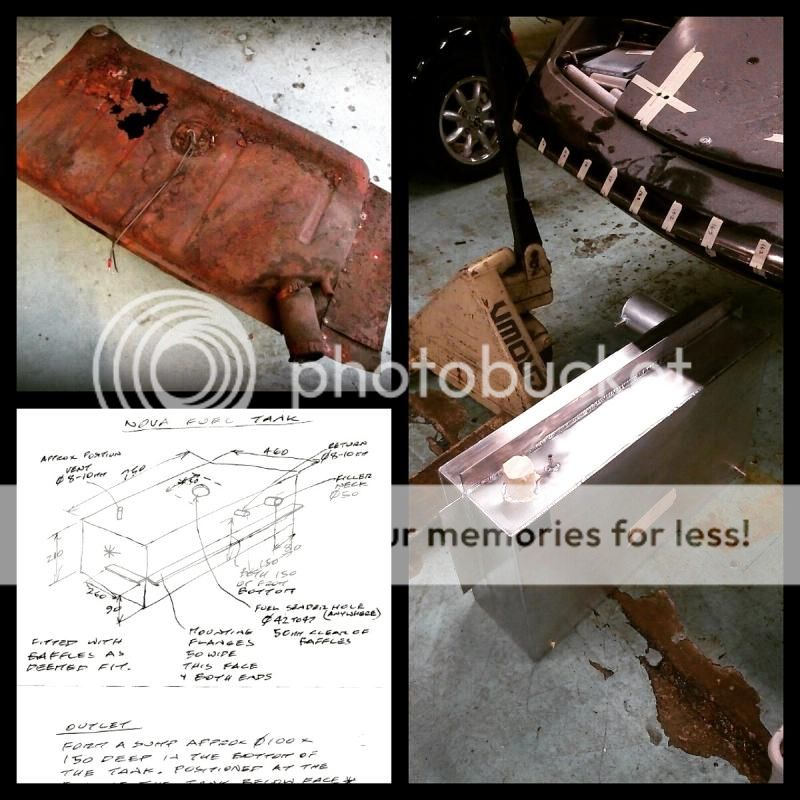
Fuel level sender has failed already! CBS part, fitted to brand new, unused tank, has rusted and gone all stiff (and not in a good way!)

I'd like to say this year, but it's a fit it in around other jobs thing, so no guarantees


__________________


Veteran Member

Status: Offline
Posts: 44
Date:
Permalink  
 

*Excited squeals*

Canopy is back in place - not many of you get to say that about your cars! 


This seems the obvious solution to ingress and egress really... Roofs, doors, superfluous design vanities!


__________________


Veteran Member

Status: Offline
Posts: 44
Date:
Permalink  
 

This brings it up to date, Dec 2016.

It may be rivalling Binky for length of time on project, and may well continue to do so for some time yet!

Hopefully some have found it an interesting read however?

I'll try and keep the thread up to date :)

Paddy

__________________


Veteran Member

Status: Offline
Posts: 44
Date:
Permalink  
 

Not as interesting as I'd hoped maybe!

Just a quick update to show that this is still ticking over nicely 


The first trial fit up of the Frankenstein exhaust I purchased from the VW/Subaru conversion crowd through Facebook.


And again after a little fettling by Steve - I imagine this still pokes out a bit far mind


And, of course, the all important bit - it sounds like this!


https://www.youtube.com/watch?v=m11n27SqWkw


 :twisted:  :mrgreen: 


And in other news...


https://www.youtube.com/watch?v=mD5g5O0Ff1c


I'm pretty happy as it goes lol!


-- Edited by PaddyX21 on Tuesday 7th of February 2017 01:05:31 PM

__________________


Veteran Member

Status: Offline
Posts: 44
Date:
Permalink  
 

Wow! What an impressive build this is. Lots of work, lots of time, lots of dedication. And lots of progress. Well done!


__________________
Marmite Munching Madman
Page 1 of 1  sorted by
 
Quick Reply

Please log in to post quick replies.

Tweet this page Post to Digg Post to Del.icio.us